Materials

For this module, we had to build a sign out of recycled letters. We decided to build the letters for integrity. It wasn’t really hard to find items since there was a recycle box. But, building the letters were a bit harder. This module was fun even though it took us a while to finish it.

For the letter I, we decided to use a plastic stick we found and a plastic circle. I painted the stick blue and it was kind of hard since it was plastic and the paint was watery, so it needed like 3 coats for it to show. My partner painted the circle of the I, and she didn’t really struggle with hers since her paint wasn’t really watery. The ending product was ok, I probably should’ve added more coats but it’s ok. The next letter was the N. I decided to make it out of a cereal box and also make it 3D. It wasn’t really hard to make but it was kind of hard to make it even. There were a lot of lines from where I was drawing the N so my partner painted it and it turned out good. We made the T by cutting a T-shape out of a piece of Styrofoam. Then we colored it orange. After that, we made the E. We got a little pole we found and some paint palettes. Then we hot glued them onto the pole and made the E.

Next, we made the G. I decided to do the G the same way I did the N. I cut it out of a cereal box and made it 3D. Then I painted it green to hide the lines where I was drawing the G. For the R, my partner cut it out from a material that was like cardboard. Then I painted blue with some black designs. My partner found some more Styrofoam and a metal circle, so she decided to hot glue them together. For the next T, we found a piece from a pool noodle and we rolled up some paper for the top part and hot glued them together. The Y was my favorite because we found a piece of wood for the bottom part and then we found another piece of wood shaped like a V, so we decided to hot glue them together.

At the end, we decided to glue all of them together so that the letters won’t get lost. I liked how our word turned out. I learned how to reuse items and make them into new things. I liked this module and it would be fun to do this again some time.
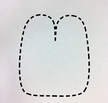
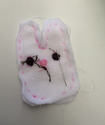
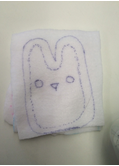
integrity Here is our word.

-Monserrat G.

Sewing Situations and Maker Project Approved

By: Celeste G.

I am so happy to say that my group’s maker project was approved! We are going to design and construct a dress, but it won’t be no ordinary dress but a dress that lights up! We will use arduino Lily pads in the dress and incorporate it as the main feature of the dress.

Now, let me tell you I love fashion and all (and my dream would be to be a fashion designer) but, I don’t know how to sew. With my group’s maker project you  could see how that would be a problem, and to make it worse nobody in my group knew how to sew. So you could see how we kinda were in a pickle.

Since we didn’t know how to sew  we had to look for help, you know, someone who could teach us how to sew. Here at our school we have a Magical Ninja Librarian. Ms. Mauser and she is way more than a librarian, she is also the

technician of our school and she is like a master at sewing. We remembered that Ms. Mauser had once sent us an email with sewing resources a couple months back and she is always making many things, so we thought she was perfect, we just had to ask her if she was willing to teach us. So, we email her and we say if she could teach us how to sew, and she accepted! We were so happy to know that we were going to learn with the guidance of an expert.


In the past weeks Ms. Mauser has taught us so much, I mean we have learned how to thread the sewing machine and how to start sewing. I’m not going to lie, for me it hasn’t been too easy, I am constantly asking for help whether it be Ms.

(These are potato chip bags.)

Mauser or my friends but I am getting the hang of it and I am really learning a lot. Currently we are making (potato chip) bags to get us experimenting with the sewing machine.

Since starting our maker project I have learned so much and it’ s stuff I’ve wanted to learn so that is amazing.

Puzzle Box Maker Project

unnamed

Puzzle Box Maker Project

By Kayla Zinsmeyer

Through out this year in PLTW, we have been completing modules that focus on a certain skill or that are designed to make us think about a topic in a certain way. Some modules are about woodworking, others about using the 3d printer, learning about photography, or thinking about how medical science could change to improve our lives in the future. And while PLTW is a class that teaches about a wide variety topics, everything my classmates and I learn comes together to help us make a decision about what high school pathway we would enjoy the most and to make us realize something about ourselves that we might not have known before. There is also one more thing that these modules help us with, and that is the Maker Project, which is what I am here to tell you about today.

The Maker Project is what we have been looking forward to all year, and I know everyone was super excited when we began a few weeks ago. It is a project that we have complete freedom with, as long as it connects somehow to the ARS mission statement. We get to use all of our creativity, and as many of our skills as we want.  If anything its almost too much freedom, there were so many ideas available to my partner and I.

                Eventually, we settled on makunnamed
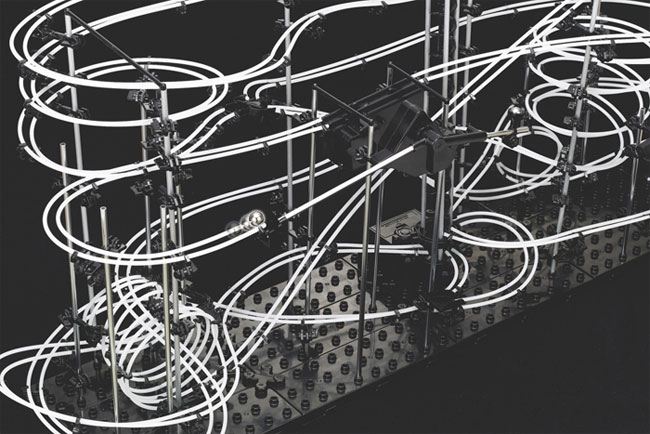
ing a puzzle box, but even that didn’t narrow down the possibilities by much. There are dozens of ideas and designs available, each with a different level of complexity to solve and build. We ended up choosing a relatively simple plan, but we both agreed that it was still going to be a challenge to anyone who tried to open it.

When we first starting building our puzzle box we used a couple different strategies to make the panels of our box (like the chop saw) unnamedbut none of them were precise enough for the box to function properly. We decided to use the laser cutter, and while we had a few problems operating it at first, we were much happier with the results. Now, we have almost completed our first box, and are looking forward to more projects like this.

Maker Faire Project

By: Bonnie J.

In PLTW class, I have recently started working on my maker faire project. For this project, we were allowed to choose what we wanted to create with a partner or group. The projects that we chose had to be related to our mission statement.

The project my partner and I decided to do was a puzzle box. We chose this because it would be a fun challenge to build. In our mission statement, it says “… solves problems creatively and ethically in support of our global community.” AnIMG_3476d opening the puzzle box makes someone have to be creatively to open it.

The first thing my partner and I had to do was find a design for out puzzle box. We found a few different designs, but then we decided on one that we liked. The design we chose is called the Puzzler Puzzle Box.  After we found our design, we got our materials and started to cut out each piece, which included six panel pieces and twelve end pieces. These pieces would all fit together and create the box.

One thing my partner and I were excited about was learning how to use the chop saw. Once we cut out the pieces, we decided that it would be better to use IMG_3543the laser cutter to get more precise pieces. Before we could use the laser cutter though, we had to create a template using the application Illustrator on the computer. When we finished our template, we finally got to use the laser cutter. This took some time, but it was worth it because each pieces fit perfectly with the others.

The next step to build the puzzle box was to use wood glue to attach two end pieces to each side of one panel piece.

Currently, my partner and I have completed constructing five out of six side pieces of the box. The only thing we need to do now is use a drill press to carve out small circles to insert magnets and dowels into one end piece and one side of a panel piece. This is going to be how you open the puzzle box, by removing one of the end pieces from a IMG_3501panel piece. My partner and I were also thinking about engraving a design on our box to make it more unique and painting it one solid color to make it more challenging gong to open.

Playhouse by Lucero Puente

This six weeks, me and my group did not do a module, but instead, we were working on a project for a Makerfaire, which is towards the end of the school year. Right now, a lot of people are working on their projects to present at the Makerfaire. What my group is doing is building a playhouse for little kids that are aged 3-6. After we have finished the playhouse(we hope to finish it before the Makerfaire) we want to donate it to a school or maybe a children’s hospital( for example, Dell Children’s.) When we were designing the playhouse, we were kind of unsure of what it would look like and the measurements, and things like that. Afterwards, when we found out what we wanted it to look like, we decided on it to be 6x5x6 ft and we wanted to paint it to look like a barn/ farm. Basically red on the outside and a few more details. On the inside we wanted to put things in so that the kids come ld be cozy. We want to put in a book shelf so they could put things in there, and then a few pillows in there so they could sit/lay down. That is basically what we want to put in it and then we are going to put in more things so the kids could be entertained. So far in class, we have only made three out of four frames for the playhouse, and it may seem like a little, but it takes work. We have to measure them and cut them to be exact measurements and then put them together to make it sturdy. We have actually done a lot, but it was fun and we hope to get this done perfectly.

More than Just Plush

Hello Readers! Last time, I had written about the struggle to find the right maker project and even though I liked all of my ideas, they weren’t meant to be. Instead, I ended up joining the Giving Bunny Project group. At the time it was only Izzy (Isabella Vergara) who was in the group because it was she who started it, aIMG_3055[1]nd I was in much need of a project that I applied. I wouldn’t say that I was good at sewing and embroidery but right now I’m grateful for every bit of experience that I had.

The Giving Bunny Project’s sole purpose is to create little stuffed bunnies and to give them away. Based on that information, Izzy started the next class after my application by teaching correctly how to make them. Let’s just say that at the end of that day, my hands were coated with pen. To make a bunny, you first need to trace the outline of the bunny, then embroider it’s little face, after that we sow the bunny together with the very complicated “backstitch”, then we would flip it inside out, sew on it’s pom-pom tail and finally stuff them (with the  final addition of closing it up). I wouldn’t really say that its a complicated process but making the bunnies takes IMG_2830[1]much more time than expected.

Soon after my application was accepted, Lendy (Cano) and Vanessa (Mireles) applied as well and we split up the jobs to make the process faster. At first we were all working on embroidering the bunnies’ faces, me also giving basic sewing classes to the newcomers, but as soon as we had enough bunnies with faces, I started to sow the bunnies together. More people also means more distractions and it is very easy to get distracted but I guess that we manage.IMG_2771[1]

Our goal right now is to finish up making as many bunnies as we can. Emelyn (Macias) applied as well so now we have five people working on the bunnies which is a relief but we still need a lot more. So far in the project we have laughed, we have fought but I still enjoyed most moments. I hope people smile when they find these bunnies, and  I think we’ll do well for the make-o-rama too.

By: Karla Rodriguez

Artwork

When you make artwork you’re expressing yourself, you are saying something about yCaptureourself. You’re showing other people what you think or how you think without using words. Most people say you can only use paper or canvas put your artwork on, but there’s actually another way. That’s what I want to show people in the Make-O-Rama that you can use different materials. My material is wood, I am tracing out something that I have drawn on inventor and then laser cutting/engraving it into a piece of wood.

The first piece of artwork I chose to trace on inventor was a fire, water Ying-Yang that I had drawn. The hardest part when I was tracing the Ying-Yang was doing the fireside because each flame was unique so I couldn’t just make one, then copy and paste it. I also had to do the smaller flames inside the big imageflames. I was making flames in three steps side, top, side and sometimes I had to go back and fix some mistakes. Not only did that part take me the longest, but it was also the hardest to do. Since I was doing just those three steps repeatedly I was getting bored and distracted. I gave myself a goal I was going to finish it that day and that’s what I did. The second hardest thing was cutting it out. Why? Because the wood I picked out was for some reason very flammable .When I put it in the laser cutter in and it started cutting it was catching on fire so I didn’t know if it would go out and it’s on its own, when the laser cutter moved or I would have to pull it out the laser cutter and stomp on it to put the flame out. Fortunately that didn’t happen and I was able to cut it all out.

I feel like I learned the importance of setting a goal for yourself because you get things done quicker and easier when you know what you’re aiming for. I also now know new tricks to the laser cutter so next time I plan on it not catching on fire. The next Art piece I’m doing to do is tracing out my Dragon, Icefire, wonder how that’s going to go.


By Zoё Magee

The Giving Bunny Project By:Vanessa Mireles

What it is about…

The Giving Bunny project was started by Isabella Vergara. It is about making other people happy. All you have to do is hand sew a bunny and when you finish you give the bunny a name, and put it anywhere you want so when someone sees it Bunny 1that person can take it home. You can put inspirational quotes that can make them smile.

Materials…

  • Tearaway stabilizer: So you can trace the design of the bunny and know where to sew (make dashes instead of tracing).
  • Plush fabric: You are gonna use this for the body where you trace the design.
  • Polyester stuffing: When you are done sewing the bunny you are going to stuff it (the more the better).
  • Hand-sewing needle and thread: To sew the eyes, and the nose.
  • Pom-Poms: You will need this before you stuff the bunny. Hand sew the tail with white thread.
  • Scraps of Fabric:This is optional because it’s just for designing the bunny like scarfs, bows, etc.

How to make it…Bunny 2

First you are going to get this trace out of the bunny and use the plush fabric to trace it on to. When you have done that and have cut out the body, trace out the eyes and nose. Once you have completed that, get some brown thread and sew the eyes on following the dashed lines around the eyes. With pink thread you are going to trace the nose and then use a little brown for a line under the nose. Once you finish sewing you are going to back stitch, if you don’t know what that is, it’s just turning the bunny around with the other side and stitching that up. When you are done turn it inside out and stuff it. Then sew the bottom and you are ready to decorate.

Bunny 3        Bunny 4           Bunny 5             Bunny 6

To Build Even Better By Erin N.

On April 24, 2015 it will be the Ann Richards Schools first Make-O-Rama.  My groups project is a marble run.  You may remember having a marble run as a child, a multicolored plastic thing that little balls roll down. It may have looked something like the one on the picture to the right. marble-run But my groups marble run is going to be a little different. Of course there’s a main post that begins all the journey of the marbles.   There will be two starting points.  We already have one ramp built out of wood and are holding test runs on this ramp, but of course it hasn’t reached its goal of the bottom of the marble run. That is because the other ramp will be joining with it, but we just need to print it. If you’ve never heard of a 3D printer before you are probably really confused. A 3D printer is a bit self explanatory, what it does is print

3D printed marble run

3D printed marble run

different 3D things out of a plastic filament, you can print things from dolls to lamps to mini robots that really

function.  In our case we’re printing brackets that will hold the filament, which makes the paths for the marbles roll down.  This 3D printed ramp will start lower than the other one but will join with wooden ramp.  When the two ramps combine they will make a more advanced  looking version of the wooden one.

Fancy wooden marble run.

Fancy wooden marble run.

This isn’t completely random with the 3D printed ramp and wood styles, it has a deeper meaning along with it.   I thought of this while I was taking a look at what we’ve achieved so far and talking with Elayna about what the next steps would be. This deeper idea that we’re now bringing into this project with the advanced looking newer part at the end.  The whole idea is of new technology of the new era and the technology of the past.  The old reliable ways of with wooden ramps work well, while the new ways work a bit better but people can be uncertain about them or unable to receive access. When both of these people combine they can share knowledge  and wisdom of past experiences and the new can bring new technologies and different ways of doing something.  Just like how our two ramps will be working together to create something even better. Maybe something like the picture below.

Glowing marble run ramp (thinking of incorporating into our design.)

Glowing marble run course (we’re thinking of incorporating into our design.)

Positivity is key… I’m Positive. By: Chloe Leline

I’m sure you’ve been told many times by somebody to “be positive” and I’m sure that you have ignored that advice many times also. I must say I am guilty of this. Every morning when I wake up for the dreaded school, I am anything but positive. I go through my morning routine and get in the car where my mom waits with her coffee in her hand and a smile on her face. We drive to school and I recite my long list of complaints. Her response is almost always, “Your day is what you make it, be positive!” Although my usual reply to this advice is rolling my eyes I’m starting to actually put it into practice.


What made me change my mind you may ask? A few things actually, some including others and some including myself. Let me share a few examples. Example number 1: Grades. Every once in a while I get in this weird state of mind for about two weeks that grades are nothing and that school is just to stressful to handle. The last time I did this my grades obviously went down a bunch because I never turned anything in on time if at all, one of those things being the blogpost before this. I realized that I was only making school even more stressful for myself. I decided I needed to be more positive when it came to school. Instead of thinking of all the bad things about school I thought about all the good things. I can’t even explain how much better it made me feel. Of course I still get stressed and mad at least once a week but now I feel proud of myself instead of mad.


Example number 2: bird clothes. Yes, you read that right. My group of friends and I decided that for our maker project we are going to make bird clothes. We didn’t really think it through. We barely knew how to sew or measure a bird for that matter. After a couple classes of just trying our best I kind of broke down with frustration. I realized that we didn’t know what we were doing and it bothered me. I sat doing nothing for over half of a class when my teacher finally decided to talk to me. She told me that I needed to have a better attitude about everything. I listened and now two classes later I’m feeling better than ever about the project.

Displaying IMG_5897.JPG

If you’re still reading, which I hope you are, I encourage you to think back to when all those people told you to be positive and how you rolled your eyes at them. Promise me that next time somebody gives you that advice, you will at least try to listen, because that can sometimes make all of the difference (: