Topo Mapzz

​ ​image So for this six weeks, we were mainly focused on topographic maps and our science Earth 3000 projects. So in PLTW, we have been tracing topographic maps on the computers on Adobe Illustrator for a while. We have also been focused in science on our Earth 3000 projects which we are making our topographic maps for.

​ So in science, we had to pick a place we wanted to research the weather for and the climate. We had to pick our place and make a haiku wiki page on what to wear, the weather there, and what the tectonic plates were. So for our location in science, we had to create a topographic map.

So, in PLTW, we had to search for a transparent picture of the location, with contour and elevation markings, that would be suitable to trace. Once we found our picture, we had to save it to our flash drive, and open Adobe Illustrator to start tracing the picture. Once we did that, we had to learn how to start actually tracing the picture. We had to learn how to use the pen and pencil tool, which felt like it took 75 years. But once we learned how to use it, it made our lives so much easier. The pen tool, is basically a curve tool like in the PLTW application we used last year. But the pen tool took a bunch of time, so we asked our fabulous teacher Mrs. Sauter, if there was anything different we could use, because we were very squished for time then. So Mrs. Sauter told us that there was a similar tool that is way less time-consuming and way less frustrating. The pencil tool. Ah, yes. This tool saved our lives. I honestly have no idea what we would’ve done without it (probably the same thing). But the pencil tool just traced all the lines we needed to trace.

​ We only had a few struggles with this project. We only had like, 2 issues. One, where we only had like 2 classes left to finish it. Two, where we couldn’t stop being frustrated with the program and just wanted to smash the computer against the wall and run out of the Makerspace garage. But once we got over ourselves and just did the work, whew.

​ So in conclusion, just take your time man. Just do what you have to do when you need to do it. It’s really not that difficult if you ask for help when you need it. So chill out, ask for help, and do it.

Alyssa D. 🙂

Birdhouse by Sage O’Brien

These past few weeks Lily and I have been working on the Fabrication & Construction Module. I really like this Module and suggest it to others. In this module, you go through the basics of using and identifying a variety of tools and materials. The end product of this module, results in a birdhouse.  Nail

First we practiced using the miter saw by cutting a 2×4 piece of wood into pieces that were measured 6 inches. We then took 2 of those pieces and drilled and nailed into them. First we used a hammer to nail in 2 nails, then a drill to pre-drill holes for our screws, then a impact driver the screw in the different screws. I found this very helpful, because I think it’s a really helpful skill to know your screws, and how to drill them.

When we started designing the birdhouse, we had to consider the materials we had, needed to use, and the practicability of the user. (bird) First, we experimented with pre-cut wood by planning out how our birdhouse would be constructed. Then we measured everything and made cut list, which is a list telling us everything that needs to be cut. We have not yet continued this project due to not being able to use the equipment while sub is here. But I can’t wait until we can get back into the construction room and get to finish our birdhouse.

Intro to Photography Module

Lestle Soto

The intro to photography module was very interesting for me, and very fun. For the first part of the module I chose a significant picture and wrote about what it meant to me. I chose a picture I took of the city of Los Angeles, this city is so important to me because living in a city like that is my goal. That city makes me so content and I thought it was a beautiful picture I took from my airplane. The interesting thing about photography is that not everyone has to understand what the picture depicted to you when you took it. Photography can depict different things to different people, everyone has a different perspective, and that’s the cool thing about it.

The sIMG_2128econd part of the module was to build our own camera. I thought this would be difficult, but it wasn’t, it was very unique. We had to build a cardboard box for the body of our camera. We cut a square through the front of our camera and put foil over it. We then poked a hole through the foil, which needed to be very small for the camera hole.

After building the camera we had to go in the dark room and put camera film in the camera. We then went outside and took a picture of a plant. We had to leave the camera hole open for two minutes, for the picture to be shot correctly. Last, we went into the dark room and developed the picture, which wasn’t bad for it being our first picture. This module was super fun and I encourage everyone to try it!

Bridge Fail by Brenda P

This past 6 weeks it was that time again to choose another module to execute and my partners and I decided we should switch it up a bit. The module we chose was part of the engineering family and we didn’t think much of it we did our challenges, turned them in moved along yada yada, until we come upon… DUN DUN DUN. Challenge two.

I think I’m exaggerating a little bit, but challenge two was actually not that bad. The challenge had us build a bridge out of only toothpicks, string and glue. First we made a design, we couldn’t decide on which design to use so we combined all three ideas for a final design. Next we got our materials, as I mentioned we could only use glue, toothpicks and string so the whole process of building the bridge was glueing toothpicks together and trying to get them to stick. We were running out of time and we were still gluing toothpicks together so we decided to make our bridge a little bit different. What we did is we crossed our toothpick sticks that we managed to build over each other and wrapped them in string, and trying to make it sturdy from the middle and the ends so it would hold more weight. Eventually when we finished it ended up looking nothing like a bridge but even though it didn’t look like one like it was supposed to I feel like we did our best and used our creative ideas to make something work.

(Our "Bridge")

(Our “Bridge”)

This whole experience was very frustrating and challenging so this is why I’m calling it a bridge fail. Overall I’m glad we tried something different but I don’t think engineering is for me. Although my experience wasn’t so great with engineering I encourage everyone to try out new things, yes in the end you might find out you’re not so great at it or maybe you are really good at it and want to proceed doing it but in the end at least you tried and that is all that really matters. So my point in writing this essay is try new things! you never know what might happen.

Fun Topographic maps by Selena A.

What we’re doing in GTT for our latest project is making our topographic map for our science project. A typographic map is a map that shows what the 3D model would look like. It was challenging because we had been having to do tracing and it takes a very long time to do. It was really fun to do because it’s fun to learn of this new thing. It was a cool project to do and in the end so many topographic came out looking amazing.

Take care by litzy 🌈

Taking care of what is “ours”

Think of this: Your parents bought you a brand new phone. A phone that you have been wanting for months. You promise to take care of it and the one day your friend asks you to use it to call her mom and then boom your phone just feel to concrete. How will you feel? Someone just came and invaded your property and broke something that was yours. Now you have a broke phone. A phone that you promised to take care of.

Now instead of being a phone make it the maker space. The maker space in basically ours. It was made for the students. A space that you have to create what ever you imagine (of course with the permission of a teacher ). You have to take care of what is yours, of course it’s not your but you are trusted to take care of it. My point here is that even if it’s not yours or is take care of it. Take care of it like if it was yours. The maker space is there to help us. The maker space is helping us by making us make our mind grow and create all these amazing things. For example we are influenced by the maker space to create our maker project.

What I’m trying to say is take care of everything that’s yours or not. Your are being trusted to take care of that phone or maker space etc. Take care of what is “yours”

Build Time!

Engineering!

For the first time I have experienced building, and it is difficult. I have recently done the structure and fabrication basics module, where you have to cut a 2 by 6 (inch) piece of wood and screw screws into it. I didn’t expect it to be so difficult. I had a hard time hammering a simple nail into the wood. It was even more frustrating to have to make a hole in the wood and accidentally make it the wrong size.

Displaying image.jpg

Above is the picture of my wood sandwich, which isn’t very tasty. I had fun using the impact driver and the drill, but I found it hard to hammer in the nail. I was supposed to take a selfie with my sandwich, but sadly my selfie taking skills aren’t where I’d like them to be.

The next step to this module is to make a bird house. I’m not looking forward to having to nail the wood together, but I have to be optimistic or I won’t get anything done. I am looking forward to making something with my own hands, and getting to see the outcome.

Image result for basic birdhouse

We plan on our birdhouse to look like this, but with two floors! I’m excited to see how it turns out, and what kind of birds like to live in the house.

~Elayna Middleton

Topographic Maps

By: Bonnie J.

During this six weeks, instead of working on modules we were working on topographic maps for a science project. A topographic map is two dimensional model of the Earth’s surface (represents 3D world). In our science projects, we got assigned a location. My location was Los Angeles, California. For our location, we were supposed predict what it would look like in the future. Part of predicting what the future would look like for the different locations, we were also supposed to create topographic maps.

First, we had to get into groups based on what our location was. Once we got into our groups, we talked and took notes on what a topographic map really is. The next step in this project was to find a 2D topographic map of your location. After finding our picture, we found out that we were going to be making the 2D topographic map into a 3D model.LA Topographic Map

To create a 3D model, we used the laser cutter. Before we could use the laser cutter, we had to choose what our group roles would be. My group role was the graphic artist. The graphic artist was supposed to use a computer program called Illustrator. In Illustrator, we had to use a pen tool and trace each line on our topographic map (as you might see in the picture). This process took a lot of time to complete because there were so many lines.

Once we were finally finished tracing every line on the topographic map, another person in our group was in charge of setting up the laser cutter and cutting all the pieces from our map.

After all of the pieces of our map were cut out, two other people in our gIMG_2062
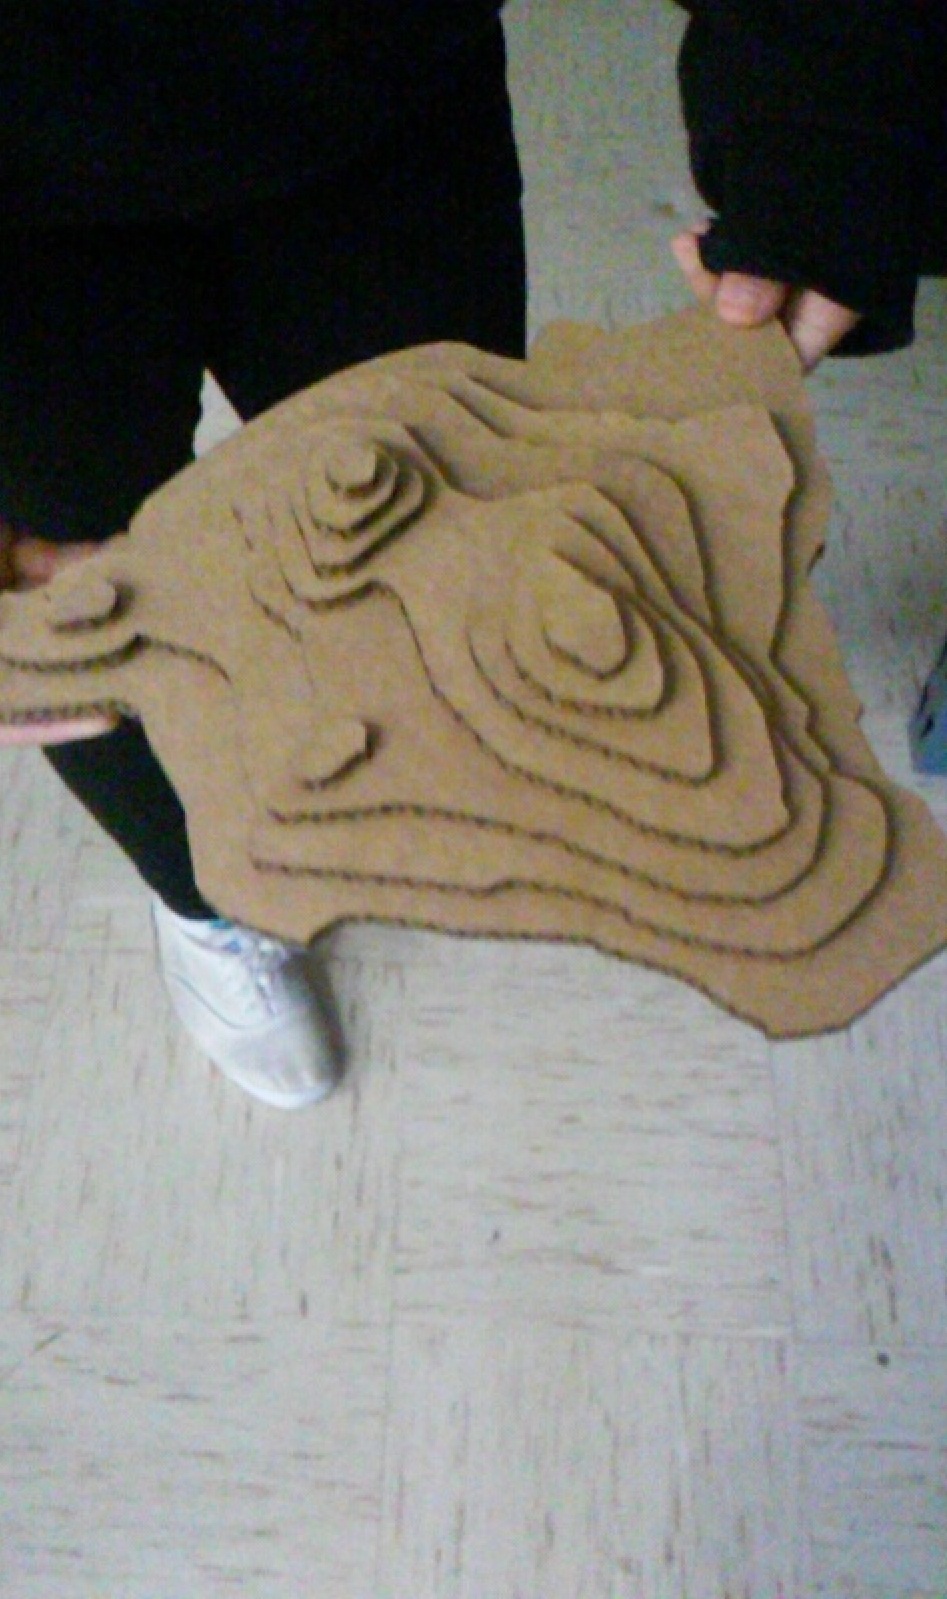
roup were in charge of assembling all pieces into a map, showing the different elevations. The topographic map showed different mountains in the Los Angeles area.

Overall, the it was amazing to see our final 3D topographic map of Los Angeles. Even though the project was difficult and frustrating at times, it was a good challenge.

Engineering by: Lilly A

The module I chose to do was “construction and fabrication basics”. It’s actually really fun to learn how to use all the tools.

At first I didn’t see myself liking the module because I am not really interested in engineering at all, but it’s actually pretty interesting. We learned what a lot of tools are called and learned how to use a couple of saws. The saws we learned how to use was a “Compound sliding Miter saw” and a “Band Saw” personally I enjoy the miter saw, it looks kind of big and scary but, it’s not, it is super easy to use as well.

So far in this module I have built a wood sandwich, which was where we had to cut two pieces of wood and hammer a nail, and screw a few screws into it. My partner and I are not finished yet, but we are making a birdhouse. We got to do everything, cut the wood, glue and clamp it, put nails in with a nail gun, and use the band saw as well.


     It is pretty amazing to me that we are able to do this. I haven’t been anywhere else but, I don’t think other schools have a makerspace like us. We have the opportunity to stretch our creativity to infinity and beyond. There are so many tools and materials you could probably make anything!

Computer Automated Drafting

The module I am currently working on in my PLTW class is computer automated drafting (CAD) which is under the engineering topic. In this module so far I have had to draw and I am currently using a program on the computer called inventor that is not so easy to use.

Before the first challenge of CAD our assignment was to watch a video in which Ms. Sauter explained some real life situations that included drawing different types of sketches. This led to the first challenge where we were supposed to find an object to do our orthographic and isometric sketches. I chose my flash drive and my sketches came out pretty good, better than I expected them to come out. I had some prior knowledge before this module because in the 7th grade I also did something very similar to what we were asked to do.

The second challenge was to create the object you drew in the first challenge in a computer program called Inventor. It was kind of hard but not that hard because I have used this program before and some things came back to me as I played around with Inventor. The outcome of my flash drive in this program was alright, it was hard getting all the little details in there but the basic things of my flash drive came out pretty good.

This module was pretty much done independent and I was satisfied with my work. And I also know the knowledge/skills I am gaining through this module will help me if I ever chose to be a professional engineer in the future.