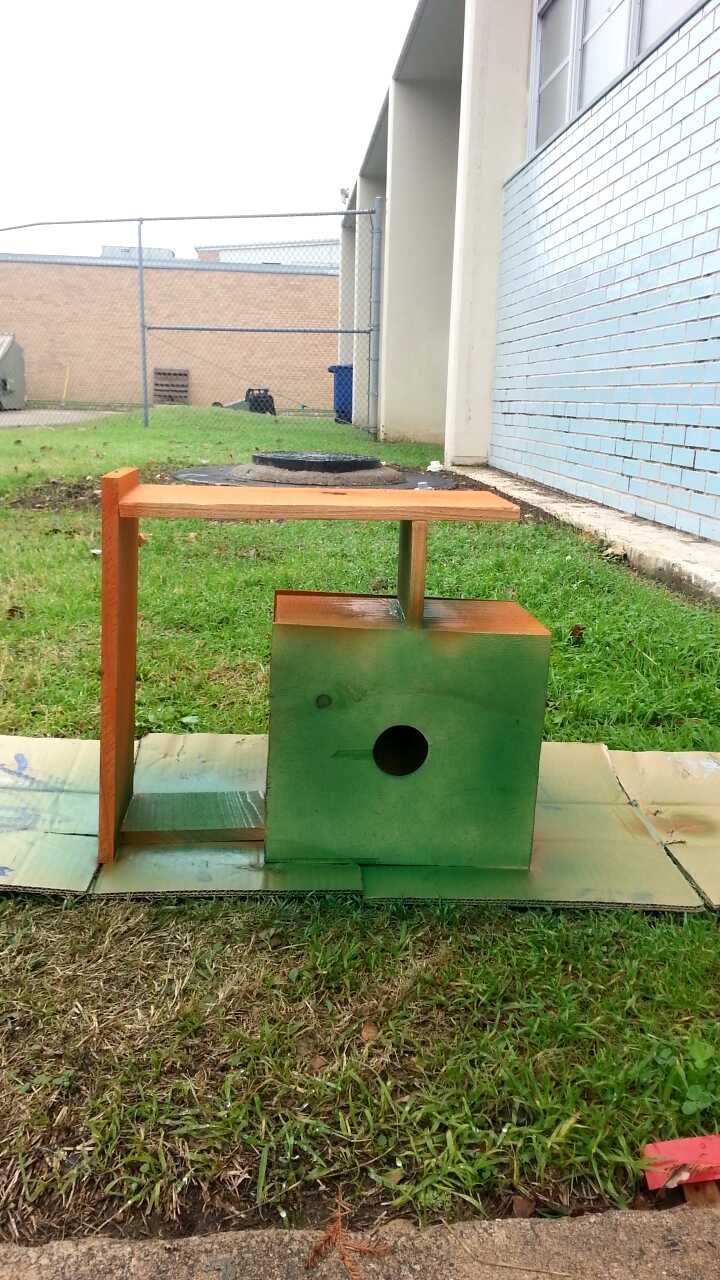
Creating Our Own Pinhole Camera! By: Lauren Gredicek

Featured image

Our pinhole camera!

When I think of cameras, I think of these big fancy complicated things. What I never thought was that I would be able to create my own camera and take my own pictures. And it wasn’t big and fancy like I always think of cameras to be. Nope, our small pinhole camera only consisted of 4 things: a can, cardboard, electrical tape, and of course film. It still amazes me that this small, simple object produces photos, and I would like to share my experience and thoughts about the Intro to Photography module with you!

This module was fun, and I think it was one of my favorite modules. What we did was make our very own pinhole camera out of basic household materials and take images of the world around us. It was another module where we got to be creative, which is one thing I like about it. It didn’t seem that hard to complete, but it definitely tested our patience when things didn’t go our way.

Featured image

Some of the photos we took!

I would like to say that the first photo we took with our self-made pinhole camera turned out completely perfect, but of course that didn’t happen. There was a lot of trial and error in completing this module. Many times a photo we took didn’t work, and we had to think, “Ok, what can we fix about our camera to improve it next time?” Sometimes there was a light leak, or sometimes the camera moved when taking the photo, but we were able to learn from these small mistakes and after many tries we were able to take some cool photos. To be able to take your own photo with something you made truly amazes me. It gives you a feeling of accomplishment; that you can achieve anything you set your mind to, even if this was only a small photo taken in a small pinhole camera. You can’t give up after the first try when something goes wrong. That is something I’ve learned after completing tis module, just like in every other module I have completed. I’m glad that we didn’t give up after our first photo didn’t work, because we were able to create some really cool photos.

Featured image

Our camera in action.

It’s so easy to just take out your phone and snap a photo, but we never actually think about all the things behind it. Like, for example, how the first photo was taken and how it has evolved into the photos we can take with our smartphones today. To me, it’s just really cool to think about the history of photography and where it all started. Photographs are really beautiful because they can capture the good moments in life, and save them forever. There are many things in life that you want to capture so you won’t forget, and that is made easy with a simple photograph. This module helped me to understand all of this and the importance of photography and the history behind it all. Not only that, but it taught me important life lessons like not giving up on the first try. Other things I learned was that we have to look for the small mistakes, because sometimes our smallest mistakes can be our worst enemy. But, our small mistakes shouldn’t discourage us. Once you have found the small mistakes, you need to learn to create a solution and make your product even better. This module taught me a lot of things, and I enjoyed completing it.

A Railroad To The Future

By Bella Roberts

As the semester is coming to an end, I am wrapping up my computer science module that I have been working on with my group for a couple of weeks. This module has been hard work but really enjoyable at the same time. In this module we had to design and construct an object that would be programed and powered by a battery and devices called Little Bits. This process took some time but I am very happy with the outcome that my group and I came up with.

As I continue to learn new things and experience amazing developments in PLTW, I find myself coming back to the task and challenge of time management. Personally, I have struggled with this skill and I am still working on it, but overall it is important to help make our modules with the best quality work. That is why during this module we tried to focus on communicating well and not getting behind. In the end, we were pretty successful but there is room for improvement and I hope to start that improvement in future modules or even my maker project.

The object that my group and I made to be powered by Little Bits was a train that was made by using a laser cutter. This brings me to another cool part of the computer science module-using the laser cutter. To me, the laser cutter is a very cool tool, and I look forward to using it in the future. I think it is very interesting the way it cuts so well on all types of materials and it helped us greatly with our module.

Throughout the module, I felt like I was always solving problems or collaborating with my team members on something. I think that it was a good thing and it helped us to make our project better. It also made me realize about what Project Lead The Way is really about and how learning how to solve problems in a technological and STEM related worlds is important and it will help us in the future.

A picture of our train from the side.

A picture of our train from the side.

photo 3

A front view of our train.

photo 5

Our train showing the Little Bits.

Overall, this module taught me a lot and all of the things I learned, I hope to contribute to my future challenges and endeavors in the wide world PLTW.

Home of the Birds by Karla Ruiz

We are used to living life for our own good just thinking about what is best for us and our family. There are only a few people in this world who think about other things and animals and what is best for them. Well in our PLTW class, we make sure that we think about the things that others usually don’t.

One of the modules that is provided for us is Constructions and Fabrication Basics, and basically what we did was build using different electrical powered tools. Although that sounded very easy when my team and I were reading through the instructions, it wasn’t easy. We were required to build a birdhouse out of different sized wood that a bird (of your choice) was able to live in. To begin with, we started of researching the different birds in the area. We chose the Sparrow, because it was small, and could fit into small places. At this point, we thought it wouldn’t be so hard because in our heads, a small bird would equal a small house, which is less building. After all of our research, we had to brainstorm different ideas of the layout of our birdhouse.

Brainstorming was not very easy, but it was not very hard. It had to be full of right angles, and had to be stable. What that means is that there could not be any dangling pieces of wood anywhere. That may have limited many of our ideas, but it was all about trial and error and we were willing to do that to make a birdhouse to the best of our abilities. When we finally came up with a birdhouse design, we had to get all of our measurements onto pieces of wood so that we were able to cut it. We used the different saw to cut the wood, and we used wood glue to make sure all of our pieces were put together as strong as possible. When we had all of the pieces where we wanted them, we clamped them, and left them to dry for 30-40 minutes. By the end of the drying time, it was the end of class.

When my team and I got back to class two days later, we unclipped all of the clamps and moved onto the final part of our birdhouse, which was painting. That didn’t take as much time as the glue did, but it did take us about 30 minutes to make sure that all of the paint was fully dry. Once we brought the birdhouse back into the classroom, we added a screw to the top of the birdhouse so that we would be able to hang it off of something sturdy. Although this was a long process, I enjoyed working with my group and learning more about the restraints and complication in building something as simple as a birdhouse.

1417793724543

Failure Is Our Friend

blogIn our PLTW class we learn many life skills such as working with big tools. Tools that every single one of us would never touch due to fear. But this class teaches us to fear nothing.

I’m very grateful  to have a Makerspace because this space teaches us many great things. During my last two modules, I had to comprehend that things can and will go wrong at least once. At first seeing thing go the opposite of what you wanted can make you feel devastated. Eventually you have to understand that this is just a part of life. You don’t wake up every morning knowing your day will be perfect, so why should you disappoint yourself on something that could potentially have a small fix and it will work.

 unnamed (8)

Here we can see (Left to Right) Angelica, Becca, & Karla doing some research for their module.

Sure, a few things might not go right the first couple of times but that doesn’t mean you have to give up right away. When you’re in this class, you learn how to understand the power of using great tools, and the design process, but we also learn a little more than that. We learn how to give our best and never settle for less. The Makerspace is a space we learn not just from those giant powerful tool but also the mistakes we make.

Overall, I am 100% confident that the class of 2019 is very grateful to have such an amazing learning community along with great projects.

What is a Makerspace?

How does the Makerspace help us grow as scholars?

The Makerspace is a classroom with a clean lab and a messy lab. During the clean lab we use computers, electronics and anything that still maintains the area clean. The messy lab is an area where we get to work with saws, spray paint, a laser printer, a 3D printer, and so much more. Well, the Makerspace is helpful and important to our community because, we get to have a hands on experience of what it feels like to actually be part of a specific career.

For example, If I was going to focus on Media Technology, I would be challenged to create a video about our mission statement along with different shots to represent the importance of our mission statement.

image  unnamed (9)

Clean Lab(Left side), Messy Lab(Right side)

By: Yoselin R.

Prosthetics are fun to build, who knew?!

Isn’t crazy how the semester is over in just 5 school days? I’ve just learned and done so much in this class in just one semester. In just a few months we will have to choose pathways, ack! But I’m not here to do a grand reflection on every single thing that I’ve done. I would like to talk about one module that I recently completed, prosthetics.


This module wasn’t as difficult as the bridge module and not as frustrating and anger fueling. It was basically the same process. You start with your design brief so we know what direction to head and to see our limits and must have’s in the final prototype. Then you start brainstorming ideas and draw them to see if they actually are realistic. My group and I just started thinking about the materials that were available and we could accumulate. We did a little table so we could see the possibility of the prototypes working. Once we decided on one. we got working on it. Although we had one in mind, we did some trial and error runs. We learned to not hot glue bubble wrap because it will burn you. and hot glues shouldn’t stay plugged in for long periods of time. Wood glue isn’t just for wood, but also bubble wrap.


So to conclude those fun filled two weeks, I was a blind person for a little bit over 5 minutes for an assignment, we built a super awesome and radical leg that people laugh at (but we know its super fashionable and great.) It may not be that sturdy as a manufactured one but it’s just a start right? It still pops out of place and the foot may have broken and not very safe but it’s the work that matters right?


I think what stuck with me was the process of building it. From me falling over trying to balance myself on a cardboard tube, breaking the leg structure, burning ourselves with hot glue (please take my word and stay safe by not glueing bubble wrap and plastic together with hot glue. It hurts and isn’t safe.), and being super happy when we finished constructing. I am completely satisfied with my final product to the point that I was wearing it in class while typing this post. I’ve gotta say, this may have be my new favorite module.

-Emi Garza 🙂

Time Management- Pattie A.

Hello! For this blog post I am going to write about time management and how one estimation can lead to so many wrong places.

These past few weeks, my group and I have been working on the computer science module. Our task was to define computer science and create anything using the LittleBits kit. As my group and I brainstormed some ideas, we didn’t really think of how complex the design was, but instead on how cool looking it looked. We had many choices in which we narrowed down to one, a train!

We started off by designing how the LittleBits would work and creating some ideas on how to build the train. We finally found a design and we opened it up on Adobe Illustrator. Later, we realized that the design was way too small, so we had to go back over 5 times to get the design about the right size. We had laser cut our designs over 5 times and eventually we all hit that point that we just didn’t care.

When we had finally got our correct pieces, we started building. It took us a while to figure out how to assemble the parts and when we did, we figured the rest would be easy and quick. A few moments later, we realized the cardboard was really thin and the pieces wouldn’t fit together, so we had to re laser cut second parts so we could glue them together.

When we had finally finished our train, we were told to build a kabuse. We all kind of just gave each other the “look.” We didn’t have much trouble because we just went back to our main train design and just deleted parts we didn’t need and laser cut the rest. When we finally finished both parts of our trains, our second challenge was to place the LittleBits. Of course, LittleBits are so simple and easy to use, we didn’t take more than 20 minutes to place them!

side2

When we had finally reached to our final product, ready to turn it in, one of our partners reminded us about the video showing how it worked and such. We all gave each other the “look” once again. The assignment was due the next day and we all knew we wouldn’t finish on time. Eventually, we did turn it in, barely on time.

We all can find and dream of crazy ideas that are possible to create, but knowing your time limits and making a schedule on how you will use your time is a good idea. I have learned so much from this project! Not only the building, but timing too. Stay after school if needed. Not all of us like to stay after school, but if it is needed, go for it. Do not wait or focus so much time on something, but expand it! Next time for sure will I reflect on timing and how this module taught me a lesson!

Computer Science

Little Bits and Laser Cutter

By: Truc Ly

For this third sixth weeks, my team and I chose the computer science module, where we worked with micro controllers called littleBits. Computer Science is the practice of supplying needs and solving problems through programming. The littleBits are microcontrollers, inside each little bit are a variety of controllers that are programmed with instructions. First, we tinker with them a little bit, trying to see how they work.

Our challenge is to build something that would have littleBits completing the task. It could be art or anything. It can move, or simply light up. My team thought about building a train that would move with a motor, but we tried and didn’t work out, so we just make the train light up and honk when press a button.

The process of making the train was very challenging, we messed up countless time, but didn’t give up. We used the laser cutter to cut out the parts of the train. The cardboard kept burning, and we wasted a lot of time. Sometimes, I thought that we should come up with another idea that would easier. But eventually we got it, because my teammates were being patient with the train. They assembled the main part and it turned out very well. My job was to assemble the littleBits . I had to think about each part of the littleBits would be, and work it out from there. To be honest, I didn’t really have a super organized plan, like I used to. I have no idea how the train is going to turn out.

Featured image

This is the inside of the train caboose, and you could see how the littleBits connect together. But in the end, the train turned out very well, and you could move it by pulling a little string that’s attached in front of the engine. I enjoyed this challenge very much, and feel relieved that it is finally complete, after all the hard work my team put in building the train.

Featured imageFeatured imageFeatured image
Featured image

Blog post #2

Raymya Hardeman

The Upcycling Miracle

For this project the task was to create a word using things that have to do with our school or even creating a word that reads ARS. This whole process was called upcycling and upcycling is when you use already made and manufactured materials to create a mini statue with great symbolization and that was our task.


Starting off with this project was not easy nor was it a fast job. This project would take time and me and my group didn’t exactly have all the time needed. We had about 2 weeks which wouldn’t exactly give us a lot of class time at the most we would get 4-5 classes to do it and one those days one of us were absent at least one day.


This project was hard, but that’s what I enjoyed about it. It allowed us to be creative and to soar in places never soared. Of course we did argue over what the world would be for almost a whole class period and in the end we didn’t even end up using the word which was C’est la vie a french word meaning that’s just life. The component that allowed us to actually finish the product with a well liked product was the fact that we actually had great ideas of material such as nails, string, and CD’s which may not seem like great materials, but in the eyes of creative people like ourselves we used them in a way never used before. We broke the CD’s to glue on our R, and the nail’s and string to design on our A and we painted our S which was the hardest to create.

By doing this module it prepares us for our big task which is to be able to create and do a project on our own for maker’s fair, which is where we use STEAM (science, technology, engineering, art, and math) to create what we want. This module also allowed us to gain responsibility and show off the greater leadership traits that we show. This project also taught us to always be prepared to not be able to  proceed with original ideas and to no fall apart as a group or individuals when we have to do that.


The Sum Of PLTW Semester 1-Sandy Sanchez

Hello

I would like to tell my readers about this class I take. It’s called Project Lead The Way or also known as PLTW. Now in this class, we focus on three main subjects. Bio medical science, media technology and engineering. So what we basically do is explore those three subjects with different projects or modules. The importance of this is so that we 8th graders get an idea of what each one is like for high school . In high school we get to choose one of those as a pathway. So far I have tried all of them with my group at least once and I must say, each module has affected me in a different way. Shall I explain?

So let’s start with engineering. This was the first pathway I decided to try out. It was the whole building a bridge out of toothpicks and glue thing. That first module went….. well let’s just say our bridge wasn’t the “strongest” or the “sturdiest” or even very “good”. But that didn’t stop us from facing a new module with a brand new challenge. We decided to take on building a birdhouse. Now, since we couldn’t even build a tiny bridge, we weren’t sure if we could create a not so tiny birdhouse. So with our small confidence, we decided that we were gonna build this birdhouse. And be the first ones in out class to do it! And after some sawing, gluing, drilling and painting, we had completed the first birdhouse in out 7th period class. And may I say, it came out way better than our toothpick bridge. Even though that’s not saying much, we still did a great job. This made me realize something about engineering… I really like it and I’m not so bad at tools either. I feel really confident using saws and drills and everything. I would really like to explore more on how things are built and the process you have to go through. At that point, I felt like I found the pathway for me. Until I tried media tech.

Now media tech was what I thought I wanted to do since I first heard about this whole pathway thing. And then when I tried engineering I thought I was wrong about that. But this module led me back to picking media tech… I think. This new module was where my group and I had to create a video about this new invention that was super important worldwide. Now, we really wanted to do something that really could help our world. But then we realized, we couldn’t think of anything. Until we thought of the Cool Spoon! A spoon that automatically cools your soup to the right temperature! I know, I know we really hit a worldwide problem about people burning their tongues on hot liquids… hold your applause. Anyway, creating and editing our video was super fun and it really brought out our creative side in my opinion. Which led me back to leaning towards media tech.

Then we tried bio medical science which wasn’t even on my radar about a possible pathway. Blood and germs? Not my thing. But doing this module has made me realize that bio med isn’t all about that. During our module, we had to come up with something that could help us in 10, 20, even 50 years from now. My group did an app that scans your body and tells you if anything is wrong. And we also did a watch that can tell if illnesses are near you. It was pretty fun, but I never felt a pull towards bio med during this module. But maybe I’ll change my mind soon.

So to sum it up, my PLTW class has been really fun and has exposed me to all the pathways. But I still have a whole other semester to decide what I want to do next year. Which is good because I still have no clue. I feel like I’m even more confused than I was at the beginning of the year. I guess I will keep trying each module out and seeing which seems to fit me.


The Birdhouse

“You have the screw driver on reverse, there, now that should work.”

“Zoë its not working!”

“What now? Your clamps aren’t on right. You have to use a drill bit to get through that not a screw, they are right there, no to the right, yes thats it.”

“Zoë I need your help.”

“Oh come on, I will never be able to finish my own wood block sandwich.”


That was me trying to help everyone make their block sandwiches for challenge Screen Shot 2014-12-10 at 9.37.32 PMone of construction and fabrication. I ended up helping everyone because when I was little I would watch my dad make things, and I would try to help him. Since I grew up around tools I knew how everything worked, and my partners, not so much. I ended up being the last one to finish my block sandwich because I helped everyone else finish their’s. The hardest part for me was not only helping everyone else but using the screwdrivers because I could not put the drill pieces in tightly so sometimes they came off in the wood.


Making a birdhouse is fun because we have figured out how to work as a team will and how to use the much all the tools. We get the sides of the birdhouse, first we used some example pieces of wood to tinker. We made three different designs but we couldn’t decide on one so we decided to combine them all so we ended up one really awesome design. Then, after we have the side pieces measured out, we glued and clamped them and then restarted measuring out pieces of plywood for the front and back of the birdhouse. Then when all the glue is dry we had to use the brad nailer. After we knew how to use the brad nailer safely, we all wanted to nail with it because it was fun to use. Then after we had stapled everything, we had to decide on colors. Everyone, of course, picked their own colors and you can’t have five completely different colors on one birdhouse, it would be too conflicting. In the end we ended up mixing colors and only using pink, blue, white, and green. It turned out pretty nice the birdhouse looked a lot better when the paint was dry.


I have I had loads of fun learning how to use the tools and the maker space and make things, with wood, nails, screws, and other fantastic tools. This was one of my more favorite projects.module challenges because I got to use my hand hands and make things. I think I’m going to stick to the engineering category and I even Screen Shot 2014-12-10 at 9.40.55 PMtry computer sciences next.


By: Zoë Magee