Going from Media Tech to Engineering

So last semester I finished the last module for Media Tech which was videography. I really liked doing the modules for Media Tech because it was fun learning the different stuff that the Media Tech pathway has to offer. This 6 weeks, I moved into the engineering pathway. The modules for this pathway are, mechanical systems, automation and robotics, computer automated drafting, 3D printing, construction and fabrication basics, materials, and computer science.

The first challenge was to interview someone who is in the engineering field. We interviewed Rachel. She talked about some of the challenges of this class which was coming up with new and innovative designs and finding ways to implement them. She talked about what she enjoys the most about engineering which is learning new things and solving problems/issues with a design. She then talked about why she choose this pathway. She made engineering sound like an interesting class. I’m not really sure if I want to take engineering but it sounds like a fun class.

The second challenge, which was a group challenge, was to make a bridge. The bridge could not be longer than 16 inches, the maximum height was 4 inches and the maximum width was 4 inches. The bridge had to be built with only toothpicks, glue, and string. This challenge was more like a competition. The bridge that can hold the most weights, wins. The one who wins becomes the current winner until someone else beats them, then they become the current winner.

Before we started building, we had to do a sketch of how we wanted the bridge to look like. It didn’t really turn out how we wanted it to be but it was mostly because we had a lot of trouble getting the toothpicks to stay glued together. So when we started building, we decided to make bundles of 5 toothpicks so that the bridge can have more support. It took a while to make these bundles but we finally made enough to build the bridge. We started with making two sticks that were 16 inches long with the bundles of toothpicks. That was for the bottom part of the bridge. Then we made triangles with two bundles of toothpicks each so that we can put it on the bridge. I was getting really frustrated with building the bridge because the toothpicks wouldn’t stay glued together so it kept on falling apart. We were running out of time so we decide to change it. We took the bundles of toothpicks and put them in between the two sticks we had. Then we wrapped the whole bridge with string. It ended up looking like a ladder. We didn’t get to test out the bridge but it turned out better than what I thought it would be.

   While I was doing this challenge, I realized that building stuff is just not for me. I got really frustrated while I was doing this because things weren’t going as good as I thought they would go. I think this is what engineers feel when they invent something but then it goes wrong so then they have to do a lot of work to fix it. I guess it was fun doing something different than just going around with a camera. I got to see how its like to be an engineer and what its like to go through some of the challenges engineers face.

– Monserrat G.

Biomed: Prosthetic Leg by Ana Rosero

prosthetic leg

This is how a real prosthetic leg looks like.

First time This time I tried biomed. I did the prosthetics module. The main idea of this module was to make a limb for someone that needs it, and it will make their life much better. This was my first biomed module I did, so I was a little scared about what we had to do, because it  was something that I had never done. Making Our Prosthetic Leg Our first challenge was to go without a body part like a leg or a hand for 5 minutes. Then we had to write about our experience, and how it felt. For this part I decided to go 5 minutes without my leg. It made me realize that it’s really hard to do stuff without a leg, and it’s also very weird. Our second challenge was to actually make the prosthetic leg. We learned that the most important characteristics are strength, durability, longevity, shock absorption, lifelikeness and comfort. My group and I had a lot of ideas of what we wanted to make and it was difficult to decide. My experience At first I only wanted to do media tech modules but I was done with all of them so I had to chose between biomed or engineering. I wasn’t sure if our leg was actually going to work. I really liked this module because it made me be creative and look at things in a different perspective. I liked biomed but I think I know what pathway I’m going to choose.

Modules Influences

By Melanie Arce

(7th period)

In PLTW we choose modules that are either in the biomedical, engineering, or media tech pathways. We do modules to see what pathways fit us for our high school year. Having these modules really helped me and I got to find the pathway that fits me, that pathway is biomedical.

I had a debate between myself if I wanted to do engineering or biomedical but I knew right away after doing modules under the biomedical, that pathway was right for me. When I grow up I want to be a nurse, surgeon, or a forensic scientist. All of these major mostly fitted under the biomedical field.

If I were to choose engineering as my pathway, I would have been interested in technology for like phones, laptops, and etc. Basically my job would to be involved in like in Apple, Intel, Samsung, or etc. I would of have also been interested in interior designing and designing houses, that og have been a cool job to work within.

Having these modules really helped me choose my right pathway. Having these modules helped me gain knowledge and I got to have a perspective of each pathway which helped me a lot. Also the reflections and quizes after each module helped me because when taking the quiz, I got to see how much knowledge I gain and which module I should. The reflections helped me reflect over the module and pathway, it helped me think if I were to choose this pathway then what would I do it with the knowledge of this pathway.

You Saw This Coming: by Emi Garza

Let’s face it, I’m super weak. I can’t open some doors, open up water bottles, and the list can go on. In the past module that I completed, I learned that strength is really important.


The Construction and Fabrications module was different compared to the past modules I’ve done. It took a lot of more hands-on work with a lot of elbow grease instead of just, “Ohh let’s just make a video or take a picture.” It took a lot planning and drafting.


Our first challenge was to make a wood sandwich. What holds the “sandwich” together was nails countersink screws, round head, screws, hexbolts, hexnuts, wingnuts, washers. In order to use the two pieces of wood, we had to cut the wood by using a miter saw, which actually wasn’t as scary as I thought. To keep it intact, our first job was to hammer a nail into the two pieces. Next we had to drill a countersink screw and one roundhead screw using an impact drill/driver and phillips head bit. Drilling was somewhat tough, just remembering which way the drill needs to turn is frustrating. Then, we had to drill in a hex nut, place a washer on the hex bolt, then tighten it using a wrench. Once all of the work was done, we had to label all parts then turn it in!

Our second challenge was to make a birdhouse consisting of right angles. Now this, was tougher towards the end. Thinking of birdhouses that meet the constraints was hard but once that was over, making it wasn’t too bad. Cutting wood? Eh, not too bad considering I knew what to do. Putting all of the walls together only using wood glue? Now that was tough. Using nail would crack the wood and anything else would destroy it. In order for it to dry, we’d clamp the pieces together hoping they would be dry by next class, which would end up all crooked or fragile. Our end product ended up being nothing like our drawings and the nails from the nail gun were sticking out into the birdhouse to the point where birds were put in danger.


Overall, birdhouses aren’t too bad to make! It doesn’t matter how ugly or unstable your end product is, all that really matters is the process of thought that made your product. Happy building! -Emi 🙂

attachment_51039443 (1)

Silly Ideas

Tori Baltierrabird

When given the opportunity to make a product of my choice, I didn’t have any ideas. Everything I thought of didn’t sound creative enough or even possible to complete. There were no guidelines or a set of rules to follow, and as Mrs. Sauter had told us, the sky was the limit. I always would joke around with my teammates, Chloe and Nicole about what we thought were silly ideas. There were jokes about making a giant shoe, a giant cake, a fish tank, and even bird clothes.

Mrs. Sauter had been walking by when my group was discussing how funny it would be if we actually chose bird clothes. We told Mrs.Sauter all about the idea and she was very supportive about it and convinced us that if wasn’t as silly as had thought. We soon became very attached to the idea and really wanted to create it for the Maker Faire. Nicole even suggested to make a mini closet to store the series of clothing items that we were planning on making for my bird. Soon after Nicole said that, Chloe came up with the idea to make little hangers out of paperclips. That’s when I realized this “silly’’ idea wasn’t actually that bad.

Many times we over think our ideas and don’t really stop to try and think about the outcome. There’s a reason why the design process was created, so we could analyze our constraints, as well as our abilities and learn from our mistakes. To conclude, everyones ideas are different and sometimes silly, but every idea shouldn’t be second guessed no matter how impossible.

Topographic Maps

This past six weeks the highlight for me was being able to make a topographic map of a place in the world. I really enjoyed tracing the contour lines on Adobe Illustrator. Even though at many points it was very stressful because we had so little time to complete this task. If we would have been given more time, or if I was doing it on my own ngI believe that I might have even enjoyed using the advanced program. Being able to know that I created something so extravagant like that was such a fulfilling feeling.

My group was a group of two so it was just my partner and I, which made the whole process a little more enjoyable and laid back. We were assigned two make a map of Irkutsk, Russia which we were also researching in Science, during the Earth 3000 project. At first it was very hard to find a good topographic map to trace but after some help from Mrs. Sauter we decided on a picture of Lake Balaki next to Irkutsk.

Untitled
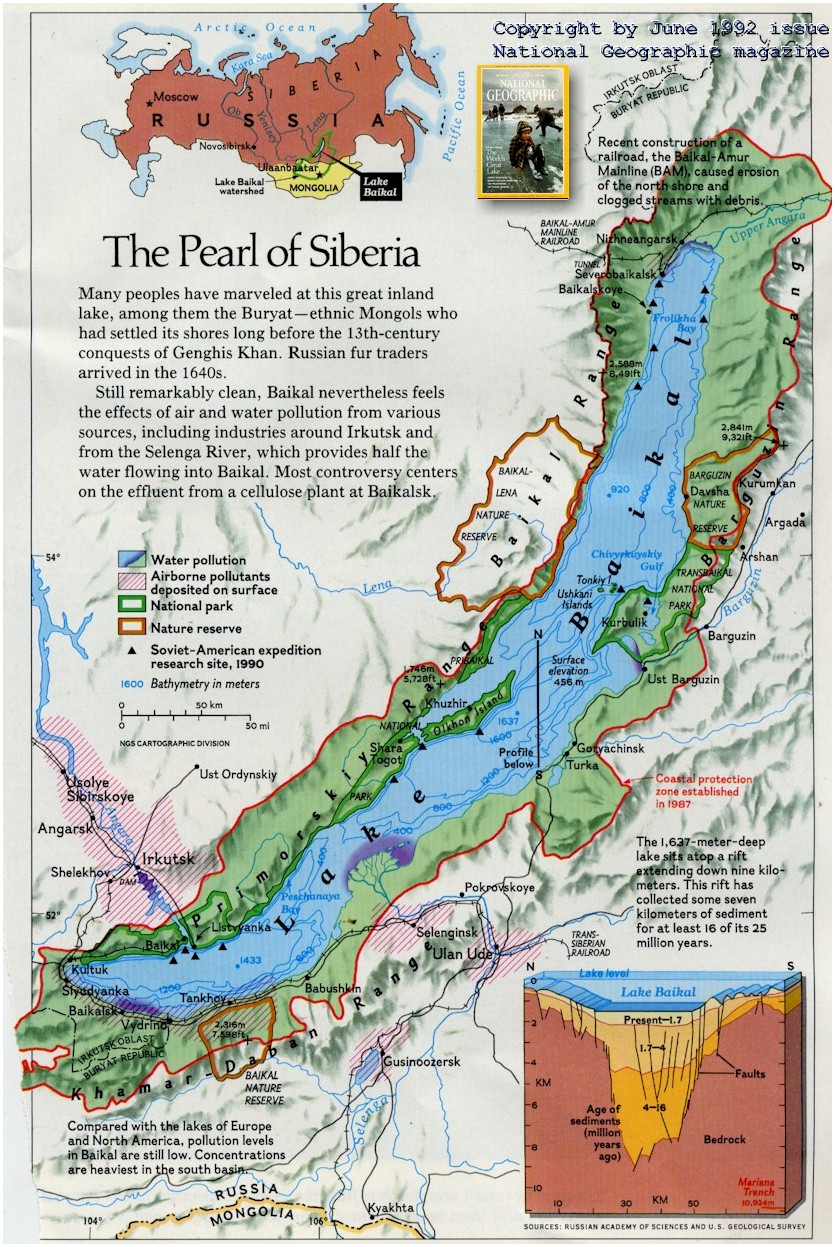
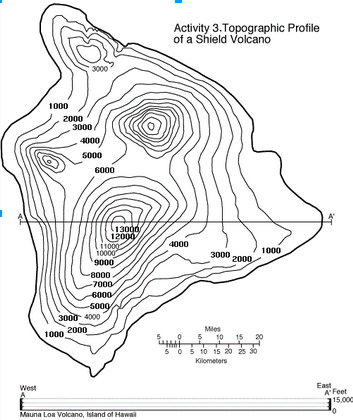
Since we chose a lake it was a little more difficult to trace and put together, because instead of going up it was inverted and each contour line was going lower and lower below sea level. Instead of just being able to print out my different layers I had to make a hole the shape of the level smaller inside of the larger level. I will add a picture to help me better explain what I am talking about, but it was a rigorous task having to make sure that I was putting the different layers in the right positions.

It was very interesting overall to be able to see what my map looked like once I was finished. I was a lot more gratifying to see it completed and cut out that trying to imagine what it was going to look like while was arranging the layers.

Macy Nelms

GRACE by Lendy C.

GRACE2

PLTW. In this class my group and I made a word, this word was Grace. This is my favorite project because it was a Hands on activity.  I like to get a project and do it my way, along the way I would ask for help but I really like to be left alone and let my imagination work.  This project was very fun because we had the freedom to do whatever, but of course we had expectations to meet, My group and I decided that we should separate the letters to take home and decorate. I was incharge of the letter “C”. I decided to make it country like, the paint is an oiled based chocolate brown with lace around it and pink glitter around it. I liked all of this project because i like doing hands on activities and i know how to work all the tools because my dad works with the tools and its easy for me to learn it and  work with it.

Birdhouse-Xochitl de la cruz

I really enjoyed this module because I learned a lot of different things for example..we learned to handle different tools how to place them like the woodcutter it was scary at first but after awhile it was easy to handle with precaution. We also needed a sketch or design of what we wanted it to look like we went through many different designs like two story bird houses and tree shaped houses. But we settled with the simple but classic box shaped bird house with a little side “porch”. We weren’t able to paint it since we ran out of time but we we’re satisfied with our final result. Throught the process we learned many skills of how to handle some really odd but cool tools. Some we hadn’t even heard of or seen for example I had no idea what clamps were until I had to use them to hold down the wooden house to not have it fall apart.

But before we did any of that we had to answer a quiz to see if we could “handdle” some of the things we needed to build the birdhouse. After we all successfully finished the quiz we started out with our small planks of wood, and try to learn how to nail or screw things into them with the proper tools. After we finished the training process we were ready to build our birdhouse! We started out cutting the pieces we needed with the wood cutter then we glued then together and let them dry. Once they were dry we clamped them and nailed the together. After we added the hole so the little birds could go into their new house. And presto we were finished completely.

Mapping the World By Erin Nolan

:a story of topographic maps and a laser cutter


Hello again, in science this past six weeks we have been studying the weather of a the certain city of our choice with a group.  The different cities ranged from Pahoa, Hawaii to Tokyo, Japan. In our other class, PLTW, we gathered into groups based on our cities.  My city was Pahoa, Hawaii.  Each group was assigned to make a 3D topographic map.  This requires three simple steps…

  1. Trace a picture of your city (or how much you choose to include) in illustrator
  2. Cut out your city(etc) using the laser cutter
  3. Glue it all together


This may seem like a simple task  which it is in theory, but in practice, not so much.

The first step is to find a simple picture of our city.  Instead of just finding a topographic map of Pahoa, we decided to do all of the big island.  So we found a topographic map of the big island. Oh sorry, by we I mean my group; Nayeli, Cloa, and Nicole for Hawaii. After we had found our topographic map we started to trace it.  This is a simple but tedious task.  There were many different lines that we had to put onto different artboards in illustrator.  But in the end we put all of the different lines/shapes onto two different artboards to save cardboard and time in the laser cutter.

The second step is to have to laser cut out our pieces, this would have to be the easiest part for us.  We have all used the laser cutter at the end of last semester.  We plugged in our USB with our pdf of our 3D topographic map pieces.  After the cardboard had been sprayed with water, so the laser doesn’t burn the cardboard.  After pressing the job, the laser cutting started.

The last step is to glue all the pieces together, which is as easy as it seems.  I don’t know how hard it could be glue pieces of cardboard together, but it was a nice ending to the project.

This project was fun and it gave me more experience in using illustrator and the laser cutter.  I’m hoping to use illustrator and the laser cutter in my maker project.

-Erin Nolan

Bird House By Cindy

Sierra, Elissa, Melanie, and I completed the Construction and Fabrication module. We learned the basics first like what the various tools are called, safety, and how to work those tools.


To practice our newfound knowledge, we made a ‘wood sandwich’. It is simply two blocks of wood connected by different screws and bolts. We made holes with the drills and screwed in bolts with the impact drivers.


When each of us were done with the required wood sandwich, we moved on to the bird house. First, we had to design it. Keep in mind we had certain constraints. We had to plan out the dimensions and had to improve on it several times before getting it right.

Using our skills, we cut wood with the miter saw and the band saw. We arrange the pieces and assembled it. We applied glue and put it together and used the finish nailer.


After school, Sierra and I refined the house making it look beautiful. (I came up with the idea that it should have been camouflage) We painted it altered shades of green and brown. When it was finished, I believed it was a masterpiece.image-7