Making a Video by Arianna Nunez

In the videography module, we learn techniques for making videos/movies, as well as editing skills. We learn types of shots you can take for your video, such as a fish eye view etc. We also learn rules for video shooting such as the “Rule of Thirds”. These skills will help us to create a video with eye catching effects. We also learn the process of making a video/movie.

pup rule fo

After we have learned what we need to do we have to set up a plan for what we will shoot in the video. In our movie, our job was to capture the idea of our school’s mission statement. We had to find things in our school, or create scenes that would represent our mission statement. We, then have to create a plan of action which would give us an idea of how of video would come out. Then, once we have finished our plan of action, we can then start filming.

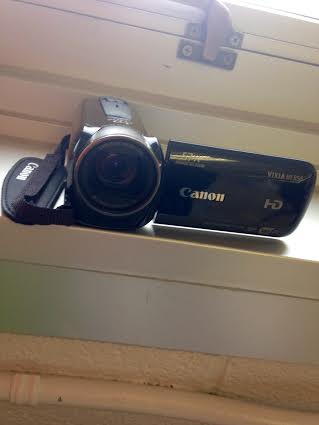
What you need to shoot a video/movie:

– Camera
-tripod
-plan of action
-places to film
-computer
-editing software

When we filmed, we had to look over every shot and see if has to be re filmed or not. Then when we have finished filming we go back to edit and look it over with Ms. Sauter. Then, we will figure out if this will fit the criteria of our objective. When going over it, we find out what we need to re film and go film new parts. We filming we realized that, we had to change and edit parts of our movie a lot, and rearrange things to create our movie.

imovei

Once, our video was finally edit to the criteria, we took our movie to the computer for editing. We had to transfer our video to iMovie for editing. Through that, we adjusted clips and it’s audio. Then, when the editing was finished, we had to do the voiceover for our mission statement. We used the microphone for recording and when finished we had to edit and add in the voice over. Finally we were finished with our movie.

Pinhole Camera By: Alexis Miller

After looking through this blog you should probably understand the module based structure of our class. If not here is the quick rundown. Our PLTW class is an online module based class. This means we are given instructions and assignments and we are responsible for finishing the assignment mostly by ourselves (with our groups) by the assigned deadline. We are allowed to choose the modules we complete but by the end they will all need to be done. Now that I feel like you understand what I mean by a “module” I will carry on with todays blog post topic.

I would like to talk about the module I am currently working on. I am building a pinhole camera. A pinhole camera is a non-electronic camera made out of basic household materials that will produce simple pictures. I was simply fascinated with the idea that I would making a camera without wires. As I began research I became even more excited and was soon ready to build.

The camera would need:


-Cylindrical vessel

-exacto  knife

-electrical tape

-push pin

-foil

-scissors

-Film paper


After collecting the materials we set to work. We decided to make our own can so we took a label roll and taped cardboard circles to the ends. After that we had to leave one side open and pain the inside black to eliminate light leaks. We then drilled a hole in the side of our cylinder and covered it with a piece of foil that had a smaller hole poked into it. After this was complete we were ready to load our camera. We had to work in a dark room  when loading the file to to it’s light sensitive qualities. After loading the film and sealing or camera light tight we were ready to take some photos.

Our photos had repeatedly failed but we did not give up we tried to problem shoot and correct our design. We found several flaws such as light leaks and ripped foil but we fixed them and tested again. This is a prime example of trial and error that worked to our benefit. Our picture did not turn out as well as other groups but it improved over the course of the project.

If I learned one thing from this module It is the importance of trial and error. I also learned how to make a pinhole camera which I will most definitely be doing again!

Photography Module and Good Lessons by: Lily Myers

Recently, I completed the media technologies’ “Intro to Photography” in which we made a camera by hand, took a picture and then developed it ourselves. In the module, the main challenge was that all the little problems that made a huge significant difference that could affect our camera and the result. These problems included things as small as having too much light leaking into our camera, or too little or too much exposure and so much more As well, as learning how the camera works and how minor problems can have a big impact I practiced a very important skill. Finding a problem and meeting it with a solution. Although it might seem like the sympalist skill but it can be difficult and hard to find the most efficient solution.

This is a skill that I used a lot. The first time my group tried to take picture it turned out bad. We figured out that there was a little gap in the cardboard and tin. We figured out that we could use a lot more tape and feel around for any gaps. I found the problem which was there was light gaps and then I found a solution, although it was hard to figure out where the light leak came from because of feeling around. We fixed it in the solution by putting tape on all the holes even if we were not sure.

The second time, although it worked really well the picture turned out really white. We saw that problem and found out through some help from other groups that it was over exposed. So the next time we fixed that. It shows that the solution does not only have to be  from you and you can look for resources.

Through finding the problems and finding the solution, you can learn from the past. Like I did when I kept on making and improving the photograph. I could use this skill in any problem I face and I am glad I got this module to help me practice and expand on my knowledge.

Magnificent Modules

Magnificent Modules

By: Rebecca Brackin

In PLTW, we are constantly building and creating new things. Going into this class, I didn’t know what to expect. Then, our teacher, Ms. Sauter, started talking about something that we would be doing throughout the year. Something that our whole class would basically be based off of. Our foundation- modules. When Ms. Sauter started talking about it, I had no clue what a module was. It was very confusing to me. The word module itself intimidated me (don’t ask me why, I don’t really know myself).
My first real module that we did that wasn’t really more of a practice round involved bio-medical science. My group and I’s task was to create an interactive poster that had what we thought medicine would be like in 20, 50, or 100 years. We chose 50 years, because we had the most ideas for that. The things we wanted to be on our poster were things that semi-related to teenagers, because that was the people who would be viewing the posters for the most part. So, we ended up with three medicines: Insta Acne Removal, Anti-Bleeding Gel, and Sunscreen smoothie. The instant acne removal was something we thought teens would be raving over in 50 years. We predicted it would be a cream you apply to problem areas on your face, and in a matter of minutes, poof! Your skin is clear. The Anti-bleeding gel is something that scientists have already started working on today. It’s a gel that you apply to wounds to make them stop bleeding. It makes your skin tissue bond together to help heal the wound. The last prediction was sunscreen smoothies. I know it sounds gross, but we thought it would be a smoothie you drink that has a lot of vitamins to help protect you from the sun.
Then, we drew them on a poster, in a cute, colorful manner, and got the Aurasma app to make the poster interactive. We made it so when someone gets the Aurasma app on their phone and scans the pictures, a video pops up on their electronic screen where one of our group members is talking about each prediction. It was a great way to share our ideas.
I thought that was a great module to start off with, and I’m so glad I did. Since then, my group and I have completed to many more modules, and reached so many new levels. And, if you go to Ann RIchards, be sure to go to the makerspace and check out our posters!

MediaTech Module

By Kayla Zinsmeyer

Recently, my group and I completed the Media Tech module. The entire experience was completely foreign to me, mostly because I have never been overly interested in the technical side of things before. Since there wasn’t any interest to begin with, I never went out of my way to try it out. However, my group insisted that we at least try it out. Obviously, I eventually agreed and I began my force-fed Media Tech experience. Looking back now, I’m really glad I did, even if we had a bit of a rocky start. There were two things in particular that I found especially interesting: The idea process, and the actual filming.

The process of coming up with the idea for our project (a projector phone) was realised in a round-about way. We had been stuck on this step for a while, occasionally throwing out ideas, but nothing was really catching our attention. Eventually, as they often do, our conversations became off topic. However this conversations that would typically be considered out of place, ended up giving us the idea for the project. One of my group members, Bonnie, recently got the new iphone 6 and we were discussing it and what new features would come out with the iphone 7 in the upcoming years. This is when we came up with the idea for a projector phone. Since we had all been discussing it moments before, it was the obvious choice.

Filming was a very unique experience for me. My group decided to divide the roles, I was the camera-man, Bonnie was on cue cards, and Izzy was our spokesperson. Like I mentioned before, I have never been interested in most media tech activities, but i thought using the camera was actually pretty fun. I rarely use cameras stronger than the one on my phone, so it was very different than what I was used to.

Tools

A tool that I recently learned how to use was the Wood Laser cutter. I first used this tool during art class, not PLTW. It is one of the power tools that are available to us in the classroom, however. It is a super cool tool that even though I have only used once, I enjoy it a lot. I think it can be used for a variety of projects and make your work look very neat and interesting!

The way you use it can be a bit difficult. I used Adobe Illustrator to create a design. Then, we saved it on a flash drive and hooked it up to the printer. It took only a few minutes for it to create the design onto wood. It was so cool watching the laser go over the wood! We could create intricate designs and it would cut out every one perfectly.

I think this is a very unique tool because it can be used to create many different projects. You can cut out pieces, but it doesn’t have to remain 2D. You can make many different parts and fit the pieces together to create something different entirely. This tool is extremely versatile; it makes it available for use in many different projects. You can use it to execute a variety of different ideas.

I like this tool because it gives you the opportunity to create art in a different way. You can use it for different products that need to be cut out of wood, plastic, or cardboard. It is much easier than trying to cut out things on your own, and much faster. You can use it for so many different ideas, and that is what makes it such an interesting device.

Personally, I think the laser wood cutter is my favorite tool that I have used thus far. It offers versatility, quality, and efficiency. I think that once you get the hang of it, it can be an extremely rewarding machine.

-Georgia H.

Why We take this Class

Pltw is a class of experience.

Of collaboration,

Of pure elbow grease and brain work.

A class of failure,

Repeated failure,

And still some,

Until you come close to getting something,

Anything that could somehow work.

And then it fails.

Epically.

So you collaborate with your friends,

And they may slow you down,

But eventually it helps,

Because it’s something you couldn’t do on your own.

So it’s just might work.

Then it fails,

Kinda.

Then you succeed,

Kinda.

So you tweak it,

Little by little.

And then it works,

It’s not perfect.

But it works.

That is PLTW,

You fail immensely,

For one single victory.

And it’s the best feeling when finally finish,

Because it works,

And that’s what you’ve worked for.

This is what PLTW is all about,

not success,

but how to get there.

~BUnmi Oni :p

Image

Videography

Lestle Soto

The Rule of Thirds ☆

The rule of thirds was a big key concept and something I really went by when filming. I did not know what the rule of thirds was before this module. The rule of thirds consists of dividing the image into two horizontal and two vertical lines. You try to position your image along those lines, so the main element of the picture isn’t positioned directly in the middle. The rule of thirds is a very interesting, simple, and beautiful concept of photography. You can also use the rule of thirds in filmmaking, my partner and I tried to position the frame of our video in a certain way.

Here are some pictures using the rule of thirds;

picother pic

The Planning Process ✍other other pic

My partner and I had to do quite a bit of planning before we could actually start the filming process of the video. We were first given a constraint that our video had to do with the mission statement. At first we imagined it would be tough for us to film a video around the school, we then sat down and just brainstormed. We also knew we had to incorporate the rule of thirds into our video and make transitions into different frames run smoothly. We said the mission statement a few times out loud to get a thorough explanation of what we had to include. After we did that we wrote down a few ideas for each line or every couple words for the mission statement. We were then finally ready to film!!

This is the camera we used for filming;other camera pic

The Filming Process ✌

There were lots of different things we filmed around the school for the video. But right before we were about to film we grabbed a CHARGED camera pack and a tripod from Mrs. Sauter’s room.. We screwed the camera to the tripod then got to filming.

For the first line in the mission statement; “The Ann Richards School for Young Women Leaders,” we filmed the big sign at the very entrance of the school right when you’re walking in. For the second line; “Dedicates itself to prepare young women to attend and graduate from college,” we went to the college center (a very amazing resource we have here at our school) and filmed the sign outside of there. For the third line; “Commit to a healthy and well balanced lifestyle,” we of course did the logical thing and filmed in the cafeteria. For the fourth line; “Lead with courage and compassion and solve problems creatively and ethically,” we filmed some of the amazing painted work in the hallway on the wall that says, ‘creativity’ in black letters and beautiful colors surrounding. For the last line; “In support of our global community,” we filmed one of the blue posters around the school that said something about the canned food drive (which we’re supporting the community by donating). That was basically it for the filming process.

The Editing Process ❀

After we finished filming all of our video clips, we had to do the most time consuming part (in the opinion) which was editing! We used iMovie to edit because I knew how to use that program quite well. First we had to import the clips from the camera into iMovie, we just needed a flash drive to do that (Mrs. Sauter let us use hers.) After we imported the video we looked at all the clips we had and deleted some of the unnecessary or too long footage. We spent a whole class period just dedicated to editing, we also filmed a voice over in the video. My partner and I would alternate who said what clip, so we both had an equal amount of speaking time. Near the end of the video we used the song, ‘Wildest Dreams’ by Taylor Swift to fill the part when we weren’t talking for a few seconds.

Overall I had tons of fun working on this module. It was probably my favorite module so far. Even though this module had lots of different parts it was challenging, and that’s what I liked about it.

I have experienced iMovie many times in my life; I’ve used it to make movies in elementary school, and I have also made stop-motion movies with it, but in middle school so far, I hadn’t experienced iMovie at all.
Recently, my group members and I decided on a MediaTech module, where we had to come up with an idea for a new invention, and create a video about it. My group members and I spent a while on coming up with our idea, when we thought about what we could improve on our cell phones, and we realized that we wanted bigger screens. One of my group members has the iPhone 6, which has a really big screen, but it’s a little bulky. I have an iPhone 4, which is very portable, but has a really small screen, so it’s really hard to type on it.

We realized that we wanted a projector phone, so that we could have a big screen, with a projected keyboard, so that it was easier to type. You’d be able to change the size of the screen so that you could present to a whole crowd of people.
We quickly typed up a script, and we started filming. I talked about our product, while my other group members filmed the video, and held up cue cards. We did a few takes, and selected the final video that we shot. We edited the video so that I had a ribbon under my head, and we also added music and credits.
We came up with an issue, where my hands were posed to point to images on the screen, which we were to edit in later, but we weren’t sure how to do that. We looked up some new ways on the computer, but they all seemed really complicated, and we didn’t understand them at all.

Screen Shot 2014-12-04 at 3.52.11 PM

We were really frustrated with iMovie, so when it came to the end of the class, we still hadn’t finished our movie.
When we came back the next class, I was delighted to find that Ms. Sauter had found a way to put images into our video; by changing the iMovie settings so that we could insert images. We were so happy to find that we could finally put our images in, but at one point, we needed to put two images in, which wasn’t possible. I ended up looking a little silly, because I ended up motioning at nothing, but otherwise, I think the video turned out great.

Screen Shot 2014-12-04 at 4.09.23 PMScreen Shot 2014-12-04 at 4.14.06 PM
We finally added finishing touches, even a short tune at the end that got stuck in our heads even over Thanksgiving break, and we were finished.
I realized that learning doesn’t always have to be painful; it can be fun too, especially if you are willing to get a little bit frustrated to find out new things.

Image

Pinhole Camera

This week in my pltw class, me and my group did the Intro to Photography module. In this module, our assignment was to create a pinhole camera to capture images around us. The only materials we used were a box, the inside was a dark color, paper, film, masking tape, a thumb tack, aluminum foil, and scissors. When our camera was done, we went into a dark room to load the film in the camera. We then went outside and held the camera still so light would get through and the camera would capture an image. We let light through for about 45 seconds, and then closed to camera so light wouldn’t come back in. My group and I went back to the dark room and took out the film from the camera. We put the picture in the developer, and then in water and we let it sit in the fixer for about 2 minutes. Our picture turned out all black the first time, and we tried changing the seconds we let light come in. In our 6th try we finally got it and this is what our picture turned out like! (:

Capture

Vanessa Leija