Processing Photos & Ideas By Sage O’Brien

IMG_4273The past few weeks in PLTW, my group and I have been doing the “Intro To Photography” Module where you make a pinhole camera. I never realized how easy it was to make a pinhole camera. We made it in about 20 minutes (not including time for the paint to dry), but it was still very easy. Anyone could make one at home, as long as you have these items, a round can or tube, paper, and some electrical tape. The only item you probably don’t have at home is the developer paper (film).

When we had our camera done, we went into the dark room to put film into our camera. The film could not be exposed to light so we had to work with a red light. After we put film in our camera, we closed the top, turned out the lights and went to go take the picture. We used two sticks to stabilize the camera, because a person’s hand holding it still isn’t that reliable. When we had our camera positioned in the right place, we untaped the electrical tape that cover the little pinhole we had made in the bottom on the cardboard, earlier. We exposed it for exactly a minute then covered the pinhole back up with the tape.

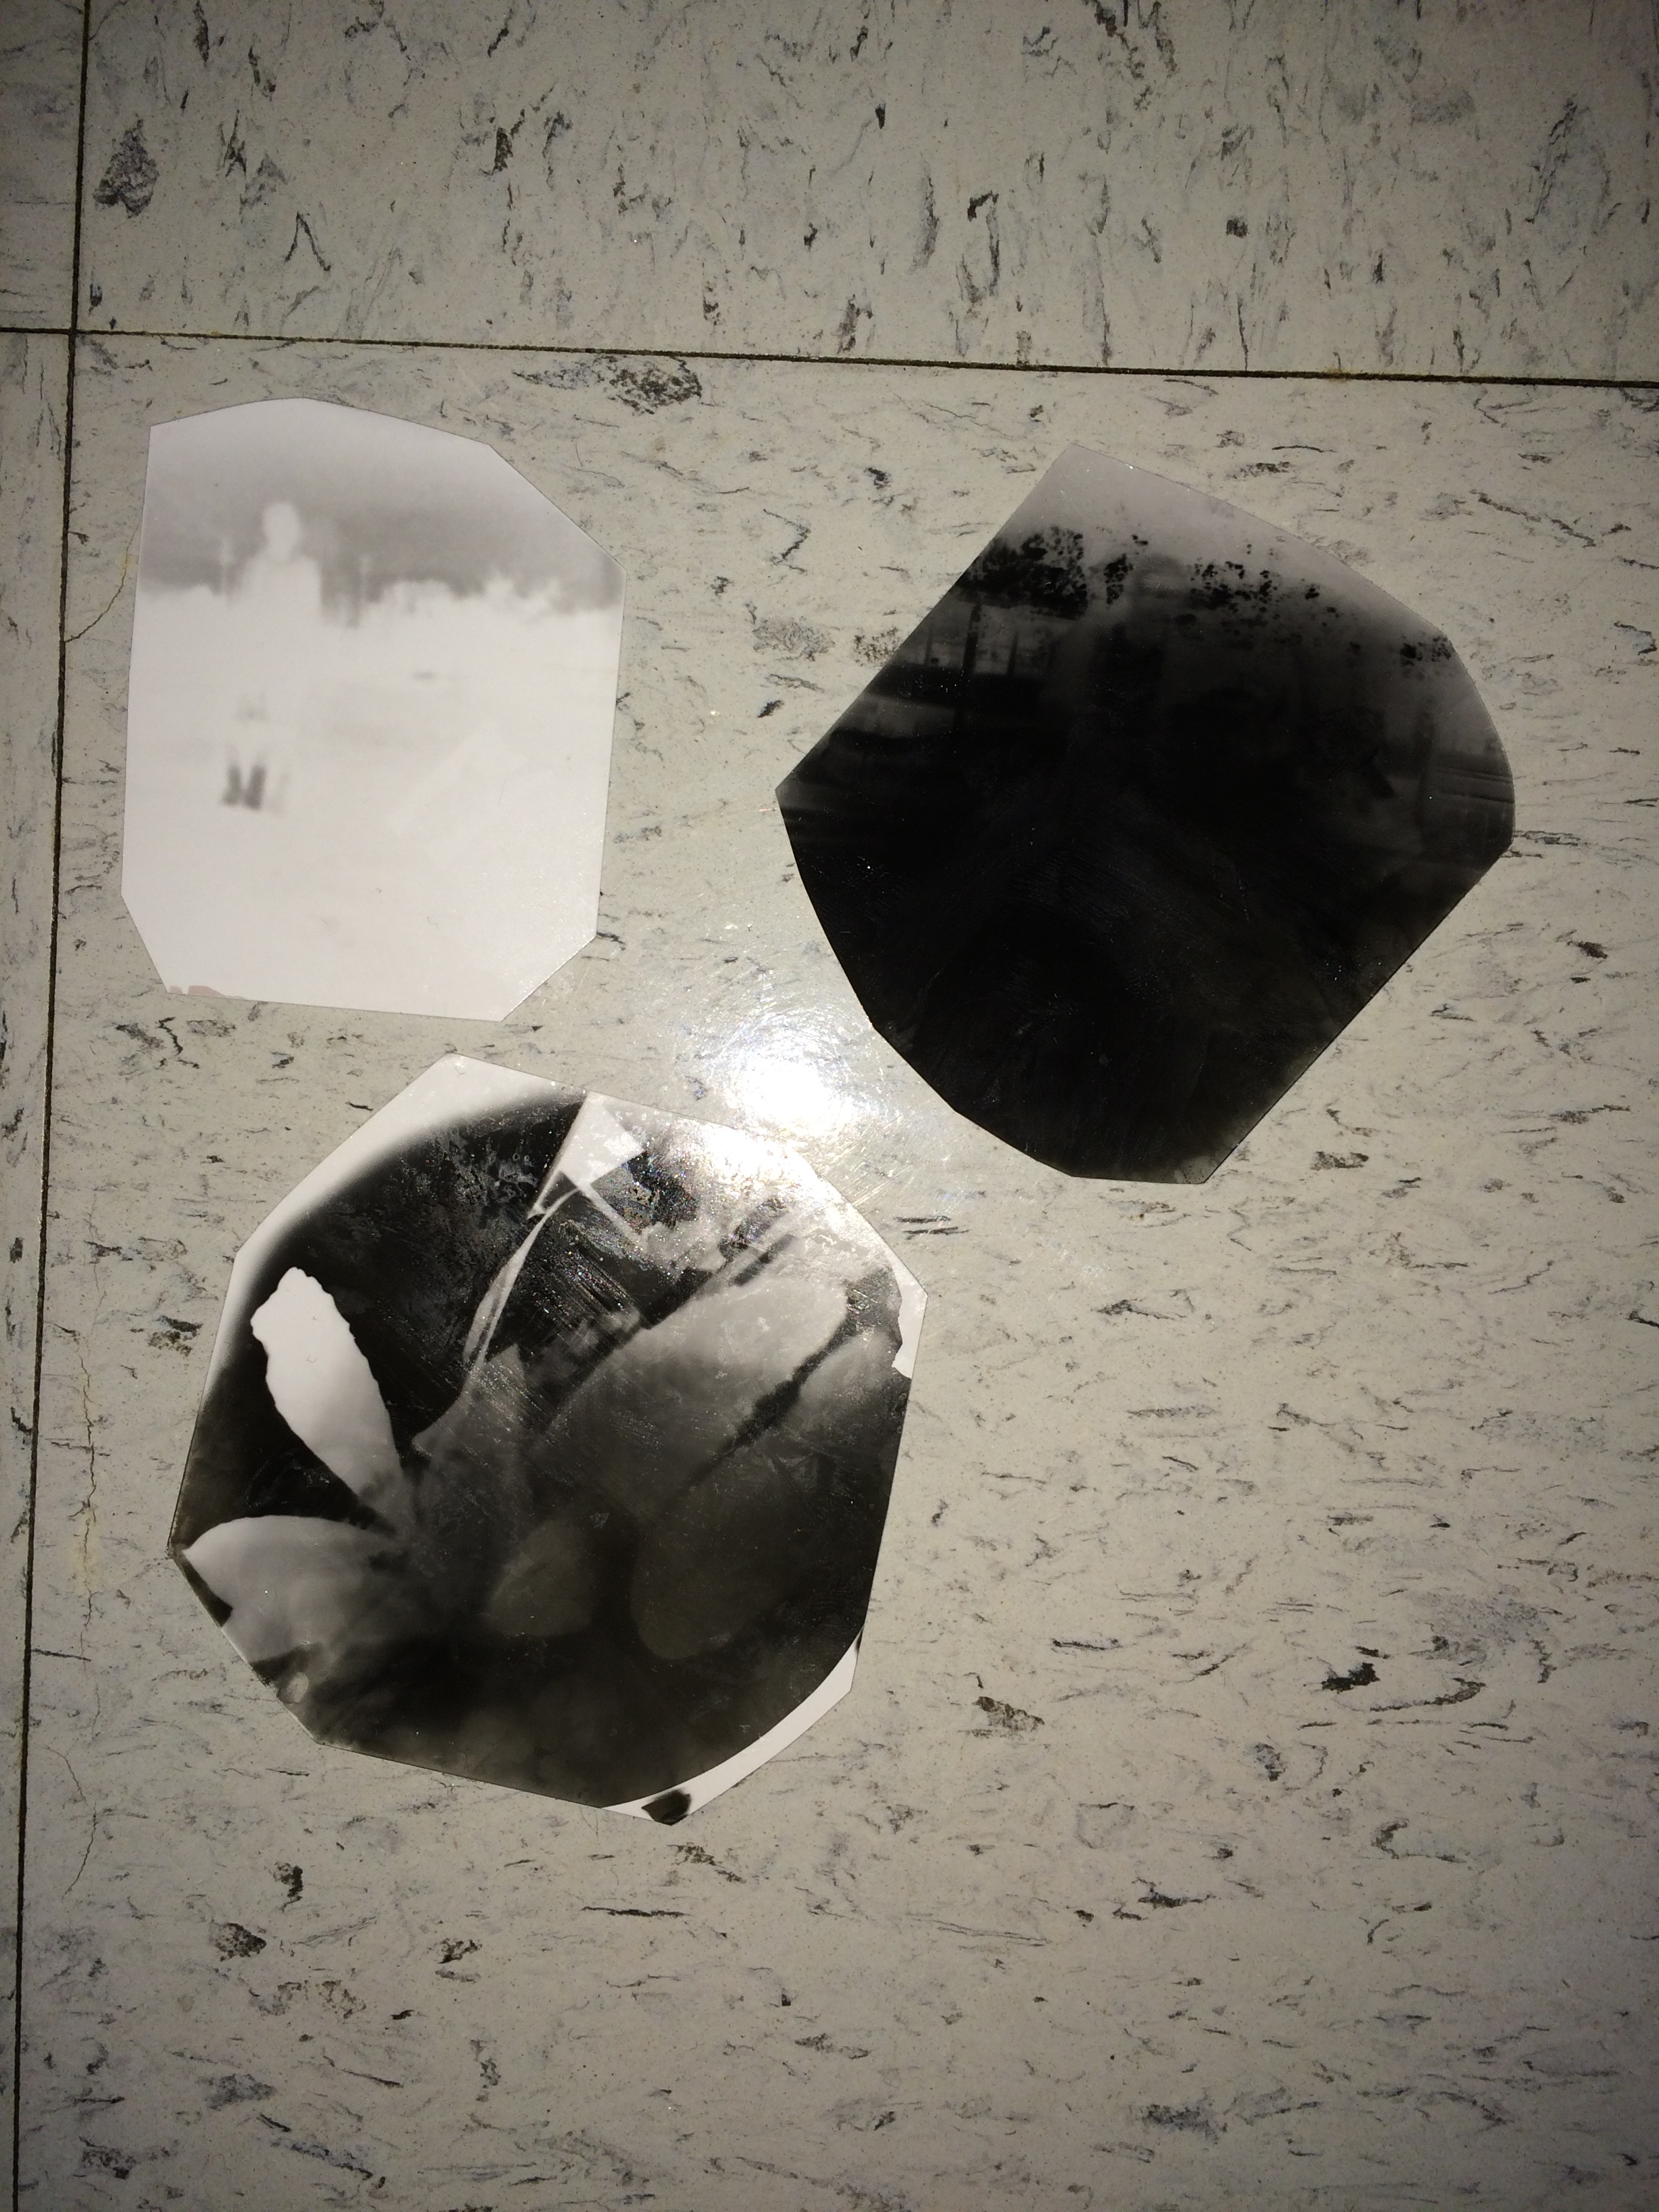
When we got into the dark room we turned the lights off and started to un-tape the top, to retrieve our film. We had 3 steps, and three orange containers with different liquids, to process our photo. The first box had developer in it, then water, then the fixer. Even though our first picture was totally back when we took it our of the fixer, it was still really fun to do. We figured that there was a light leak since the whole film was black. We decided to try 3 more times, and we got three good photos.

If you haven’t done this module yet, I think that you should really do it, or try making a pinhole camera yourself, because it’s really fun and interesting.

Mechanical Systems

By: Bonnie J.

Last six weeks, my group and I completed the mechanical systems module, which was our fifth module. For this module, we had to first watch a video that showed the different types of gears and how they worked. After we learned how gears work, we had to create a mechanical system using vex robotics kits. Everyone in the group had to build a different mechanical system. To determine what mechanical system we were supposed to build, we had take the first letter of our last names and use a chart that told us what system we were supposed to build.

IMG_0764-3I was assigned to build the lead screw. After everyone was assigned a mechanical system, we got pictures of the different systems. There were multiple pictures of the same system, but at different angles to help you build it.

We then split into two groups to help each other build their mechanical system. As I was build my mechanical system, I kept running into problems. Once I finished building the leadscrew, I tested to see if it worked. When I tested it, the middles piece didn’t move IMG_0765when I turned the handle. I couldn’t figure out what was wrong, but then one of my group members told me why it wasn’t moving. I had to take it all apart and then rebuild it, but when I did it was really cool.

For the second challenge, my group and I had to create a mechanism that would be able to prepare food. The mechanism had to have at least two different mechanisms built into it. My group and I decided to build a mechanismMechanical Systems Challenge 2m that would be able to roast multiple pieces of food at a time. We included a simple gear train and a bevel gear.

I would have to say that this was my favorite module I have done so far this year because I have always liked building/assembling things. It was frustrating and challenging at times, but I had fun completing this module.

Simple computer coding

     Recently, in PLTW, we all tried something new. Usually we complete a module of our choice with a group every two weeks, but this time, we did something completely different. At the beginning of the week, I kept hearing things about the “ARS hour of code”, and how we would be learning how to do computer coding at least twice.

     When I first heard about it, I assumed that it would be complicated, boring, and kind of unimportant. Once we got to class, our teacher, Mrs. Sauter walked us through how to get started and introduced us to how things worked, as I slowly noticed how simple and fun it looked, I became excited.

     I spent an hour customize a name animation, and it was one of the coolest things we’ve learned so far. What made it even better was knowing that the coding program we used, scratch, doesn’t require any special software or prior skills.

     I then thought about how computer coding really is important to the society we live in. Technology is a huge part of the way people live today. Most everything is done through social media or some sort of computer software. It really does help to know what the little things we do at ARS now will help later down the road. I think that everything we do really does help us get prepared for  college, and eventually we all as a generation will change the world.

By: Samaria Shearrod

Science In Engineering

By: Celeste Osorio

Have you ever been to Circuit Of The Americas?

Well, let me tell you the wonderful trip the 8th graders (at the Ann Richards school) took. It was amazing and we all had fun. The reason why we took the trip was to test our balloon powered, recycled material cars and, to talk with the people who actually build the race cars.

This project was in our science class to study physics. Physics is the study of force and motion.

Now you may ask, what does this race car project have to do with engineering? The connection is building cars, and exploring all possibilities of the best design that will increase speed in our car. The car had to go fast on a flat track and a ramp. So when my team brainstormed ideas we practically went through the design process. It was quite complicated figuring out how to build the car with the constraints we had. The fastest way for the car to go down the ramp would be for it to be heavy. but if the car was heavy it wouldn’t move as fast as a light car on the flat track..

My group and I pulled many ideas from multiple places. I thought of how a rocket has the nose cone front to help with air resistance, so we incorporated that into our design. The theory we had was that the cone would help in the flat track and the ramp, because it would help with air resistance and let the car move faster.

The second idea I had was to put a turbine in the back of the car where the balloon air would hit it and propel the car.

I mean in theory these ideas were amazing and great but in real life it was very hard to make and construct the pieces. The wheels were made of cardboard and badly put.

When we got to Circuit Of the Americas we didn’t test our cars on the actual track but in a room.

Let me tell you my group was not ready. our wheels were the problem. When we tested it on the flat track it didn’t move at all but the turbine worked.

With this experience I learned to pay attention to every detail. I mean, if we would have made the wheels a priority like the other parts maybe the car would’ve moved. Lesson learned.

With this science project I had to use my engineer brain and put it to action and explore ideas, and look at the design and experiment. Over all I really liked how I had to use engineering outside of my PLTW class.

Media Tech

One of the last modules my group decided to do had been Intro into photography. Challenge two was to make a pinhole camera and attempt to take a photograph. At first we were extremely confused on how a can with a lid on top could ever help us take a photo, but as soon as we did the Darkroom Workshop we began to understand. We used photographic paper and taped that into the can. Photographic paper is paper with a coat of a light sensitive chemical formula. When the paper is exposed to light it captures an image and you put the paper in a liquid to produce the picture. All of this process should be done in a Dark Room and the way to see is but using a safe light. Many people think of safelights only being red, but they actually come in different colors. The red light we used happened to be red.

When we went to go capture an image, it was either that we had exposed the film to too much light or that when exposed it sooner than we thought, and many other ways. But my point is that we worked really hard to try to get at least one image, but it often takes multiple tries. I think that the main idea we learned is that you may have to try to multiple times but you will eventually learn.

Another module my group has done is videography. In that module we had to take a video of our school using the rule thirds which we had learned about in the first challenge. There were many different tricks and tips that we learned from watching tutorials on youtube done by Strawberry17. We got to film video clips and edit them on iMovie. Since the video we made had been our first, it wasn’t the best that it could be, but the lesson from this module is the same, that once you practice a skill you will eventually get better.

-Nicole R.

Videography Module by Prisila Samaniego-Marin

Hi! I’m Prisila and I go to ARS. I’m an eighth grader and I take a class called PLTW. In this class we get to explore the three pathways: Media Tech, Bio-Med, and Engineering. So far, I’ve done the media tech modules and a bio-med module. Today, I will be talking about  the media tech module named “Videography”.  In this module, we took shots from different angles all around the school. The video is pretty much a tour of the school.

For this module, we learned the rule of thirds. The rule of thirds is when the camera screen is divided into 9 parts (two horizontal lines and two vertical lines.) When the screen is divided you then take a picture where the object isn’t in the middle and its on or as close as possible to one of the lines. After that, we took different shots of different parts of the school. We edited the video to make it go faster or slower at different parts.

In order to be successful in PLTW, you have to pay attention. You have to know what you’re doing and read directions. You have to be able to work in groups and be open to new ideas. Also, you need to know different ways to do something. you have to be able to make an effort to work hard. You have to keep track of your time because it’s hard to make good quality projects in a little amount of time. For this class, time is what will make you or break you; you need time to succeed.

https://www.youtube.com/watch?v=7AP61cwq86Q

Videography- Carolina Vazquez

Hello there! I’m Carolina Vazquez and these 1-2 weeks my team and I have been working on videography. What is videography you may ask ? Well its where your basically learning about ways to pictures and videos.
What I have learned with how to take good quality pictures was the rule of thirds. This is were you focus on an object but you don’t.. this may be a bit confusing. A picture is split into three equal parts. The far left the middle and the far right. The rule of thirds is when you focus on an object but take it in the position of either the far left/right. And thats basically it.
What I have learned from taking videos is all the different angles and ways you can take a video to make it look smooth and cool. For example you can put you camera on a towel and slide it on a flat surface to make a nice sweep and a smooth transition. All of these are really cool ways to take pictures and take videos.
It’s supper fun to take these videos and pictures, but I don’t really see it as a future to me 🙂

Bio-med Pathway-Andrea H

This module that I just got done with was biomed. I must say that it was something different but I enjoyed it. The biomedical pathway is basically learning more about cells, and how your body works, and how to create medicines to help society.

In the biomed module that I did this past week, me and my group had to research a health topic concern and find ways to help it like for example if i researched cancer and i decided well a good idea for helping cancer patients would be a scanner that diagnoses if you will ever get cancer in your life and if so it tells you when and how bad and what type of cancer.

I really enjoyed this module it makes you think more about the diseases that are today and it makes you use your brain to think and use your creativity and putting that in an idea that who knows might be handy in the future.

Building A Bridge Out of Toothpicks! By: Sierra Green

For one of our modules, my partner and I (Cindy) chose to do the engineering module. We didn’t think it would be that much of a challenge, but we had different thoughts when we actually read what we had to do. What we had to engineer was far from easy.

Before I talk about our challenge for engineering, I will talk about what we did to lead up to the challenge. On challenge 1 of this module, we had to interview someone who is in the engineering field in college or someone who is in the engineering pathway at my school. During lunch, my partner and I went to interview the student of the engineering pathway. We asked them questions like Why did you choose this pathway?, What do you do in this pathway?, and What do you think are the advantages of taking this pathway?. After doing this interview, my partner and I started to get another perspective of engineering.

Once our challenge 1  was done, we moved on to challenge 2 of the module which was twice the challenge than the first one if I say so myself. We were asked in this challenge to make a bridge out of toothpicks and regular Elmer’s glue. At this point, my partner and I were kind of nervous for what our ending result of this challenge would be.

Like in the real world of engineering, we had to make a design brief and a technical drawing before we could actually make the bridge. If an engineer went and made a bridge without a plan, then it wouldn’t be a good bridge. So, we had to treat this project like it was a real life situation. After lots of thinking about our design, we finally made our design brief and our technical drawing.

Now, it was on to the hard part of this project. Making the bridge. My partner and I first started bundling up toothpicks so we could later on have a strong bridge. After we made what felt like a hundred of those, we made the toothpicks into lots of triangles that would later come together to make a trapezoid for the side of the bridge. After completing this, we repeated the process. Finally, we added the finishing touches of our bridge. We measured it, weighed it, and found out how many grams it could hold.

In conclusion, this module was a challenge. Although it was, my partner and I went through it together and finished it. We accomplished this challenge with teamwork and hard work. This challenge has given me another perspective and I can actually see myself doing something with engineering in my future.

A Whole New World!~ By Cindy

I did not know there were different types of engineers until I did the Engineering module. I had assumed engineers just designed and built machines. And that was it.

But, that is wrong. Engineering is something big and encompasses all sorts things. Machines are just one aspect of engineering.

There are the Chemical Engineers. They are involved in the creation and improvement of chemicals. The preservatives in your food and the plastic in your binder, those were made by Chemical Engineers.

Electrical Engineers are in charge of distributing electricity and also creating circuits and software. How powerful!

Mechanical Engineers are in charge of making machines. They are in charge of designing and creating small and big machines.

Civil Engineers are in charge of public transportation, construction, and maintenance. They are involved of critical parts of our lives.

Engineering is truly everywhere. In Challenge 2 of the Engineering Module, I had to design, build, and test a bridge with Sierra. We could only use toothpicks, string, and glue. It sounded easy but, it actually wasn’t.  There were constraints on the design of the bridge. Its span must be 16”. It couldn’t weigh over 40 grams. The height could not be over 4” nor could the width.

I think the hardest part was designing the bridge. I mean everyone just had a giant toothpick stick.  Sierra and I made a triangular bridge which had so much problems. We had a hard time working within the constraints of the challenge.

Making the bridge was very tedious. It was the same thing over and over making each bundle to make triangles. Then we had to attach them together. It was not the most fun. We made slow progress but, we finally finished it.

CAM01312CAM01313

It was beautiful but, I am so relieved that it is over. Yay~!